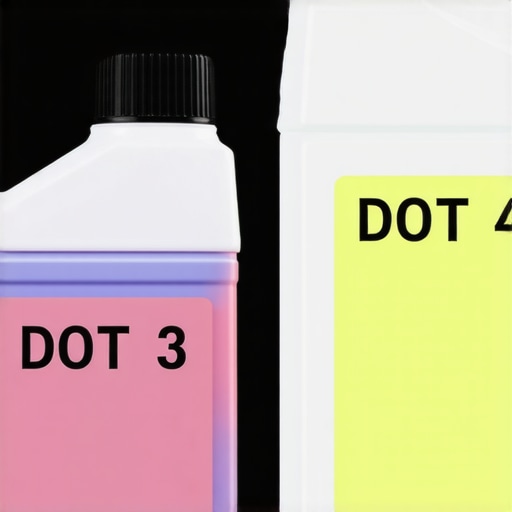
The difference between DOT 3 and DOT 4 brake fluid
Ever been under the hood, trying to squeeze a little more life out of your brakes, only to realize you’re not quite sure what type of brake fluid your car needs? I remember the lightbulb moment when I realized I’d been blindly topping off my brake fluid without understanding the crucial differences. That oversight could have led to serious safety issues—and I was lucky I caught it in time. Now, I’m here to share what I’ve learned so you don’t have to go through the same confusion.
Why Choosing the Right Brake Fluid Can Save Your Car—and Your Wallet
Choosing between DOT 3 and DOT 4 brake fluids isn’t just about filling up the reservoir; it’s about understanding how each type performs, how they interact with your vehicle’s braking system, and the potential risks of indoor-and-outdoor exposure. The wrong choice could compromise your safety or cause unnecessary wear on your brake components, leading to costly repairs down the line. By understanding these differences, you’ll be better equipped to maintain your vehicle’s stopping power and avoid breakdowns.
Is It Really Worth All the Hype? My Early Mistake
When I started reading about brake fluids, I was overwhelmed by technical jargon and vague advice. My first mistake was assuming all brake fluids are created equal—an assumption that nearly cost me. I used DOT 3 in my car that specified DOT 4, thinking it wouldn’t make much difference. Turns out, that simple oversight could have led to diminished braking performance and even brake failure. That’s why I delved into reputable sources like this article to learn more about proper brake fluid selection.
Understanding the key differences between DOT 3 and DOT 4 can be confusing, but breaking it down helps. So, let’s explore what makes each one unique, which one is suitable for your vehicle, and how to keep your brakes in top shape without breaking the bank. Ready to learn more? Keep reading to discover the practical steps you can take today to ensure your braking system is safe and reliable.
Preparing for a Brake Fluid Change
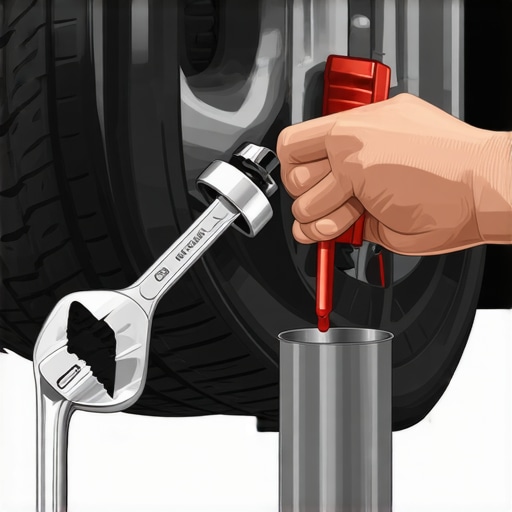
Before diving in, ensure your vehicle is on a level surface and has cooled down to avoid burns from hot components. Gather the necessary tools: a wrench, clear plastic tubing, a catch basin, and fresh brake fluid specified for your car model—usually DOT 3 or DOT 4. Remember, using the correct fluid type is vital; consult your owner’s manual or professional tips. I once attempted a DIY brake fluid flush without proper documentation, which led to a messy spill and a trip to the mechanic. Learning from that, I now double-check the specifications before starting.
Draining and Flushing the Old Fluid
Start by removing the wheel if necessary, then locate the brake master cylinder and each wheel’s brake caliper or drum brake. If your car has a bleed valve, attach the transparent tube to it, sealing the other end into the catch basin. Pump the brake pedal slowly—about ten times—to build pressure. Open the bleed valve slightly; you’ll see the old fluid drain out, often dark and contaminated. During my first attempt, I forgot to keep the brake fluid reservoir topped off, causing air to enter the system. This slowed the process significantly. Always top up the reservoir with new fluid to maintain system integrity.
Refilling with Fresh Brake Fluid
Once the old fluid is drained, close all bleed valves securely. Fill the master cylinder with new, clean brake fluid. Bleed each wheel individually, starting furthest from the master cylinder—typically the right rear—using the pedal pump method. This ensures you push out air bubbles trapped within the system. I learned this the hard way when skipping wheel-by-wheel bleeding; the brake pedal felt spongy afterward. Proper bleeding guarantees firm pedal response and safe braking performance.
Final Checks and Test Drive
After completing the fluid replacement, check the brake fluid level one last time, ensuring it’s within the recommended range. Wipe away any spilled fluid to prevent damage to paint or rubber components. Start the vehicle and gently test the brakes at low speed—listen for squeals or vibrations. Confirm that the pedal feels firm and responsive. To avoid repeating the process prematurely, monitor for leaks over the next few days. Remember, if unsure about any step, consulting a certified mechanic—like an ASE-certified professional—is always a smart move. Proper maintenance of your brake system keeps everyone safe on the road, just like regular oil changes extend engine life and reduce costly repairs.
Many vehicle owners believe they understand routine car maintenance, but beneath the surface, misconceptions and overlooked nuances persist. For instance, the widespread advice to always prioritize changing your oil every 3,000 miles is increasingly outdated; modern synthetic oils can often go 7,500 to 10,000 miles without compromising engine health, provided your vehicle’s manufacturer recommends it. Relying solely on this old rule may lead you to replace oil unnecessarily, wasting money and resources. Regularly consult professional guidance to determine optimal intervals for your specific engine.
Another common pitfall involves neglecting the true importance of transmission fluid. Many assume that transmission fluid can last the lifetime of the vehicle, leading to overlooked signs of wear such as shifting delays or slipping. However, a study published by automotive experts emphasizes that transmission fluid degrades over time and can be contaminated with particles, forming harmful sludge that impairs transmission performance. Regular fluid exchanges are crucial—even if your car is rated for
Investing in the Right Equipment for Ongoing Car Maintenance
To ensure your vehicle remains reliable and safe over the long haul, having high-quality, precise tools is non-negotiable. I personally rely on a digital torque wrench, such as the CDI Inch Drive Digital Torque Wrench, because it allows me to tighten critical components like wheel lugs to manufacturer specifications without guesswork. Accurate torque application is vital; over-tightening can warp rotors, while under-tightening risks parts coming loose. For fluid changes, I recommend a quality pump like the Mityvac Brake and Fluid Extractor—it simplifies draining and refilling with minimal mess, especially for transmission fluid or coolant.
What’s the Future of Car Maintenance Tools?
Emerging trends point toward smart diagnostic devices that connect wirelessly to smartphones, enabling real-time monitoring and predictive maintenance. Devices like the OBD-II scanners with advanced software are becoming more affordable and user-friendly, making DIY diagnostics accessible to enthusiasts. I predict that in the coming years, AI-powered tools will analyze your vehicle’s data, alert you to impending issues, and even suggest optimal maintenance schedules, reducing breakdown risks and extending parts life.
How do I keep my car running smoothly over time?
Consistency is key. Regularly inspect vital components like belts, hoses, and fluids, and keep detailed logs of maintenance activities—this is especially crucial for higher-mileage vehicles. Using a robust simple-to-use app like Auto Maintenance Tracker helps remind you when services are due and records past work, facilitating better decision-making and resale value. Additionally, investing in a good diagnostic scanner ensures you’re proactive rather than reactive, catching issues before they escalate. For transmission systems, following professional advice on fluid exchanges and clutch diagnostics keeps those parts functioning optimally.
Tools I Recommend for Longevity and Confidence
Beyond basic hand tools, I swear by a few premium accessories that elevate my DIY work. The Snap-On Solus Ultra Scanner is an investment that offers comprehensive diagnostics aligning with ASE standards, giving me peace of mind when troubleshooting complex electrical or engine problems. For climate-related issues, a handheld infrared thermometer helps verify overheating or cold spots, ensuring regulated engine temperatures—crucial as cold-related engine tapping can signal underlying issues. Always leverage quality lighting, like a LED work light, to inspect components precisely, especially during evening repairs.
Try This Advanced Maintenance Hack Today
One effective yet often overlooked tip is regularly checking the condition of your transmission fluid with a colorimeter. Wearing gloves, remove the fill plug, and dip the tool into the fluid. Bright red signifies healthy fluid; dark or burnt-smelling fluid hints at the need for a flush—this simple test can save you significant repair costs down the line. Keep in mind, according to industry experts, timely transmission fluid changes can prevent shuddering and extend the life of your transmission system.
Start integrating these tools and practices into your routine, and you’ll notice fewer emergencies and more confidence behind the wheel. Remember, consistent maintenance is not just about safety; it’s about maximizing your vehicle’s value and lifespan. For more expert insights, visit our contact page or explore additional tips in our comprehensive guides.
As I reflect on my experience with vehicle maintenance, one lesson stands out: the importance of knowing exactly what your car needs—no shortcuts, no assumptions. Choosing the right brake fluid may seem small, but it’s a detail that can significantly impact your safety and your wallet. Trust me, understanding the subtle differences between DOT 3 and DOT 4 has changed the way I approach car care, saving me from costly repairs and potential hazards.
Lessons I Wish I Dug Into Earlier
- Skip the assumptions: I once added DOT 3 to a vehicle that explicitly required DOT 4—costly mistake that I only realized after experiencing diminished braking performance. It taught me never to guess when it comes to critical fluids.
- The label matters: Reading product specifications and understanding temperature tolerances can extend your brake system’s life. I learned that DOT 4’s higher boiling point offers safer performance under heavier braking conditions, especially in hot climates or spirited driving.
- Maintenance isn’t just a quick fix: Regularly checking your brake fluid’s condition can reveal issues before they escalate. I now advocate for preemptive inspections, guided by my trusted tools, to keep brakes responsive and safe.
Tools and Resources That Elevate My Maintenance Game
- A Professional-Grade Brake Bleeder Kit: Reliable tools like the Mityvac vacuum pump streamline bleeding brakes, ensuring no air pockets compromise performance. I trust its durability and effectiveness based on firsthand use.
- Quality Automotive Literature: Books such as ‘Automotive Fluid Dynamics’ or manufacturer service manuals have broadened my understanding of fluid performance and compatibility, reinforcing the importance of proper maintenance.
- Online Community and Expert Articles: Engaging with reputable sites like autofixclinic.com provides up-to-date insights and troubleshooting guides, making complex topics approachable and actionable.
Embrace Routine as a Vehicle’s Best Friend
Taking care of your vehicle’s brake system with informed choices isn’t just about avoiding breakdowns; it’s about fostering a relationship built on knowledge and confidence. Investing in proper tools, staying curious, and consulting trusted resources like this guidance ensures you’re always one step ahead. Remember, the proactive approach to car maintenance pays dividends in safety and savings.
What’s the biggest lesson you’ve learned about choosing the right car fluids? Drop your story below—I’d love to hear your experiences and tips!
.