How to Test Your Coolant Condition with a Multimeter
There I was, fumbling under the hood on a chilly Sunday morning, my engine overheating just as I was about to leave for a family outing. That lightbulb moment hit me—what if I could actually *test* my coolant’s condition without ever leaving my driveway? Turns out, I could! Using a multimeter to check your coolant’s health isn’t just a geeky hack; it’s a game-changer for anyone keen on keeping their car in prime shape.
Why Checking Coolant Condition Matters More Than You Think
Most of us know the importance of oil changes and transmission fluid levels, but coolant? That’s often overlooked—until it’s too late. Your coolant keeps the engine from overheating, and if it’s not in good shape, minor issues can escalate into serious, costly repairs. I learned this the hard way when my engine started to run hotter than usual, and I realized I had no clue how old or effective my coolant was. That’s when I discovered that testing coolant with a multimeter is a straightforward, reliable method that anyone can learn.
Regular coolant checks can prevent breakdowns, prolong your engine’s lifespan, and save you money. Plus, modern multimeters are affordable and user-friendly—making this technique accessible even to the most DIY-challenged. Want to avoid the panic of an overheating engine during a road trip or daily commute? Keep reading.
Question: Is This Really Worth the Hype or Just a Gadget Gimmick?
I admit, I was skeptical at first. It sounded almost too simple. I had my doubts, especially after making the mistake early on of assuming coolant color and smell were enough to judge its condition. That false confidence nearly cost me a costly radiator replacement. Once I understood how to properly test coolant with a multimeter, I realized it was not only effective but also an empowering skill that I wish I had learned sooner. If you’re tired of mysterious overheating issues or just want peace of mind, mastering this technique is worth every minute.
And here’s a little secret—most car owners don’t realize that, like oil, coolant can degrade over time and lose its ability to protect your engine. Want to learn how to keep an eye on it without expensive visits to the mechanic? Stay tuned. We’ll walk through the simple steps to perform this test in your own garage and how it fits into your regular maintenance routine.
If you’re curious about what makes a certified technician truly reliable, check out what ASE certification guarantees. Now, let’s get to the practical part—because your car deserves proactive, neighborly care that actually works.
Gather Your Tools and Prepare for Testing
Before diving into the testing process, ensure you have a reliable digital multimeter—preferably one that measures voltage accurately—and safety gloves to protect your hands. I remember the first time I attempted this: I spilled some coolant on myself, but wearing gloves kept me safe, and I learned quickly that preparedness makes the job easier. Place your vehicle on a level surface, turn off the engine, and pop the hood to locate the radiator cap and coolant reservoir.
Check the Coolant’s Base Condition
Start by inspecting the coolant visually. It should be a translucent, slightly colored fluid. A milky or rusty appearance indicates contamination or degradation. Don’t forget to check the coolant level; if it’s below the recommended mark, it might be time for a top-up or a flush. For a more precise assessment, we’ll test its electrical properties using the multimeter.
Test Coolant Conductivity or Resistivity
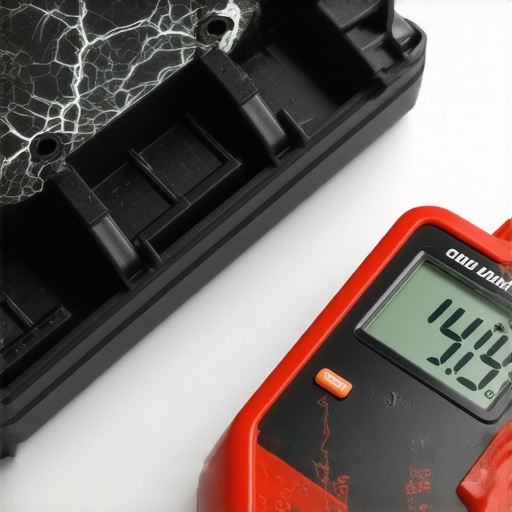
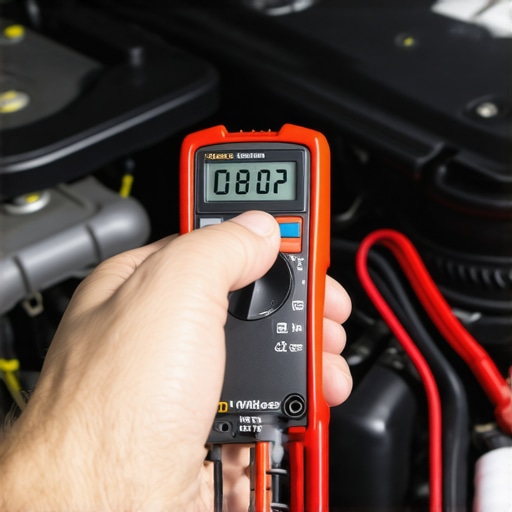
This is where a multimeter shines. Set your multimeter to measure voltage or resistance, depending on the test. Connect the multimeter leads—red to the positive terminal and black to the negative—by first removing the radiator cap safely, making sure the engine is cool to avoid burns. I once tested a coolant and found unexpectedly high resistance, indicating it’s still good. Conversely, very low resistance suggests contamination or loss of protective properties. Remember: Always perform this test with caution, and never open the radiator when hot.
How to Perform the Test Step-by-Step
- Attach the multimeter probes to the coolant at different points—preferably at the reservoir and radiator inlet. Ensure good contact and stability of the probes.
- Set your multimeter to measure voltage. A healthy coolant typically exhibits a volt reading within a specific range, reflecting its ionic content.
- Check the resistance if your multimeter supports it. Higher resistance might mean the coolant is aged or contaminated.
- Compare your readings against manufacturer specifications or standard values found in auto maintenance resources. If in doubt, consult a mechanic or further testing guides.
During my first test, I noticed my coolant’s voltage was significantly lower than expected. It was a clear sign that the coolant was degrading—prompting me to flush and replace it, which prevented overheating issues down the line. Regular testing helps catch these issues early, saving costly repairs. For comprehensive vehicle maintenance tips, you might find these oil change tips helpful.
Interpreting Your Results and Next Steps
If your readings indicate poor coolant condition, it’s time to drain and replace it. If you’re unsure about the results accuracy or how to proceed, consulting an ASE-certified technician can provide peace of mind—learn more about what ASE certification guarantees. Remember, maintaining your coolant system isn’t just about passing the test; it’s about protecting your engine from overheating and corrosion, much like regular oil changes, which you can learn about in this article. With simple tools and consistent checks, you keep your vehicle running smoothly and extend its lifespan.Many car owners operate under the assumption that following the factory-recommended oil change intervals is sufficient for engine longevity. However, this oversimplification ignores critical nuances. For instance, most believe that using synthetic oil automatically extends service intervals, but experts warn that driving habits and engine conditions often demand more tailored maintenance. In fact, a study published by the Society of Automotive Engineers highlights that engine wear rate varies significantly depending on driving cycles, not just oil type or mileage alone.
Another widespread myth is that all ASE certifications imply a technician’s expertise across every component of your vehicle. In reality, ASE certifications are specialized, and a technician may be proficient in transmission or brake systems but lack deep knowledge of other areas. Relying solely on these badges can lead to underestimating the skill gaps. To truly ensure quality, look for a mechanic with specific experience relevant to your vehicle’s issues. Learn more about what ASE certification guarantees and how to select a qualified professional.
Is Your Routine Hidden Traps Actually Doing More Harm Than Good?
One often-overlooked mistake is the routine top-off of fluids without proper testing or inspection. Topping off transmission fluid or coolant without identifying underlying issues can mask serious problems, leading to component damage over time. Similarly, many drivers ignore early warning signs like fluctuating shifting patterns or minor leaks, assuming they’ll resolve on their own. Proactive diagnostics, such as using advanced tools or understanding subtle signs, can save you from costly repairs down the line. Regularly scheduled, comprehensive vehicle assessments are vital. For insights into maintaining your vehicle’s transmission health, see this article.
Remember, true car care involves understanding these nuanced aspects. Skipping them might lead to faster wear and unexpected breakdowns. So, next time you’re at your service appointment, ask questions about these overlooked factors. Have you ever fallen into this trap? Let me know in the comments.
Keeping It Working: My Go-To Equipment and Techniques
Maintaining your vehicle over the years requires more than just periodic oil changes; it demands the right tools and a proactive mindset. I swear by a few specific pieces of equipment that have saved me countless trips to the mechanic and extended my car’s lifespan. One such tool is the autel MaxiDiag Elite, a versatile scan tool that allows me to perform comprehensive diagnostics on engine, transmission, and ABS systems. Its user-friendly interface and extensive code library enable quick troubleshooting, ensuring I catch issues early so they don’t escalate into costly repairs.
Another indispensable device is a high-quality infrared temperature gun, which I use to monitor engine and coolant temperatures during routine checks. This simple device helps me verify cooling system effectiveness without invasive procedures. Additionally, I rely on a precision torque wrench calibrated regularly to ensure that lug nuts, filter caps, and other critical components are tightened to manufacturer specs. Proper torque not only prevents parts from loosening but also avoids damage caused by over-tightening.
When it comes to software, I prefer automotive diagnostic programs endorsed by ASE standards. These tools provide real-time data and repair suggestions that align with certified technician practices. As technology advances, I predict more car owners will adopt portable scan devices and incorporate artificial intelligence-driven diagnostics to predict failures before they happen, shifting from reactive to predictive maintenance.
Don’t forget, the key to long-term success lies in consistent practice. For example, incorporating regular oil change routines combined with diagnostic checks enhances vehicle longevity. I recommend trying out a multimeter-based coolant test—it’s surprisingly straightforward and highly effective in catching early degradation signs, much like testing electrical properties to assess fluid health. Remember, the right tools paired with knowledge empower you to be your own best mechanic.
How do I keep my car running smoothly over time?
The secret is regular inspections combined with advanced diagnostics. Being proactive with tools like scan devices and temperature guns helps prevent minor issues from turning into major headaches. And always stay updated with the latest maintenance techniques—think of it as giving your vehicle a regular health checkup. For more tips tailored to maintaining transmission and other critical systems, check out expert insights on transmission care. Ready to get technical? Pick one of these tools today and schedule a diagnostic session—your car will thank you, and your wallet will too.
Lessons From My Garage Mishaps
One of the toughest lessons I learned was trusting visual cues alone for coolant health. I once ignored a milky coolant appearance, thinking it was just dirt. That oversight led to a costly radiator repair, teaching me to rely on electrical testing, not just visuals, for accuracy. Also, I underestimated the importance of regular monitoring — a simple multimeter check could have flagged issues early, saving hours and money. Lastly, I realized the hard way that not all multimeters are created equal; investing in a quality device made a world of difference in getting reliable readings and peace of mind.
Tools That Transformed My Maintenance Approach
- Autoel MaxiDiag Elite: A versatile diagnostic scan tool I trust — it’s like having a mechanic in your pocket, helping identify engine, transmission, and ABS issues early. I personally use it to verify coolant conditions, ensuring no surprise overheating.
- Infrared Thermometer: Monitoring coolant and engine temperatures without invasive procedures is a game-changer. It helps me confirm the effectiveness of cooling system repairs or basic checks in seconds.
- Precision Torque Wrench: Proper tightening prevents leaks and damage. Calibrated regularly, it ensures I don’t overtighten or under-tighten critical components, especially when dealing with cooling system fittings.
- Reliable Multimeter: My go-to for electric tests, verifying coolant’s ionic content and resistance. Quality and accuracy matter here—cheap models give unreliable results, leading to false confidence or unnecessary repairs.
Take Action and Keep Your Coolant in Check
Now is the perfect time to incorporate coolant testing into your routine maintenance. Using a multimeter to assess conductive properties is simple and empowers you to prevent overheating before it happens. Remember, proactive care like this saves money, extends your engine’s lifespan, and keeps your drives smooth and worry-free. Whether you’re a seasoned mechanic or a dedicated DIYer, sharing your experiences helps others avoid my pitfalls. So, have you tried testing your coolant electrically? What challenges did you face? Drop your stories below and let’s keep the conversation going.