The Danger of Over-Tightening Your Oil Drain Plug
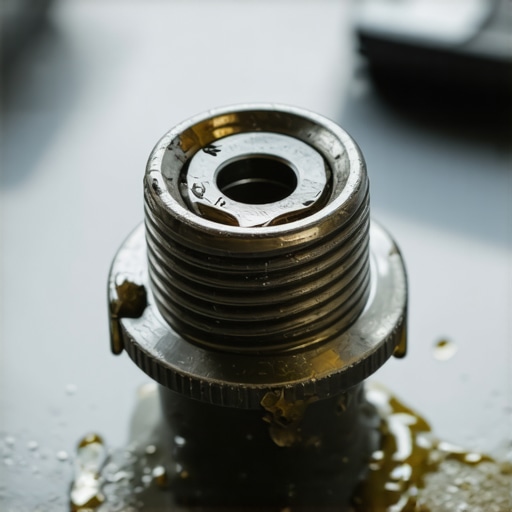
I’ll never forget the day I learned the hard way about the perils of over-tightening my oil drain plug. It was a routine oil change, or so I thought. As I snugged that little bolt, I felt a bit of resistance—more than I expected. Later, a nagging seep turned into a drip, then a sudden puddle beneath my car. Turns out, that tiny mistake nearly cost me a new oil pan. It’s a gut-wrenching feeling, realizing something so small can cause such big damage. If you’ve ever experienced a sudden oil leak or found yourself tightening that drain plug just a little too much, you’re not alone. I want to share what I’ve learned about the dangers lurking behind this simple task—and how to avoid them.
Why Over-Tightening Can Ruin More Than Just Your Oil Pan
Many car owners, myself included initially, underestimate how critical proper torque is when sealing the oil drain plug. When you tighten it too much, you risk stripping the bolt or damaging the threads in your oil pan. The result? An expensive repair that involves removing and replacing the entire pan, which is far more costly than a quick tightening job. Additionally, over-tightening can crack the oil pan gasket or even cause the bolt to sheer off, leaving you with a real headache. According to automotive experts, using the correct torque—usually specified in your vehicle’s manual—ensures a proper seal without risking damage or leaks. Interestingly, a study published in the Automotive Service Association reports that improper torque application is a leading cause of oil pan repair jobs nationwide. So, it’s not just about being cautious; it’s about doing it right the first time.
Is The Risk Worth the Tighten?
Early in my learning curve, I made the mistake of thinking that more is better. A few extra turns or a good squeeze seemed responsible enough. But that misconception could have led to a costly mistake. I’ve also seen many fellow enthusiasts and DIYers fall into the trap of over-tightening, often because they’re worried about leaks or simply unsure about the right amount of torque. While it’s tempting to crank down until it feels secure, the truth is that applying the right amount of torque—just enough to compress the gasket properly—is all that’s needed. To avoid this common pitfall, I suggest investing in a torque wrench and following your manufacturer’s torque specifications. If you’re unsure about the process, reaching out to a trusted mechanic can save you from costly errors. And remember, regular maintenance checks—like those discussed in why regular oil changes matter—are key to keeping your vehicle healthy and safe.
But what happens if you’ve already over-tightened your drain plug? Well, that’s where some careful troubleshooting and professional help come into play. I’ll walk you through the signs to look for and the best ways to fix the problem without turning it into a major repair. So, are you ready to learn how to tighten your drain plug properly and protect your engine? Let’s get started.
,
Gather Your Tools and Prepare Safely
Start with a clean workspace in a well-ventilated area, ensuring your vehicle is parked on a flat surface with the parking brake engaged. Gather a quality torque wrench calibrated to your vehicle’s specifications, along with the appropriate socket size for your drain plug. Wearing gloves and safety glasses adds an extra layer of protection. I once tried changing my oil without a torque wrench, relying on feel—resulting in over-tightening the bolt. Afterward, I used a torque wrench to re-tighten it precisely, which prevented future leaks and damage.
Drain the Old Oil Properly
Loosen and Remove the Oil Drain Plug
Place a catch basin beneath the drain plug. Use your socket and ratchet to break the bolt loose, turning counter-clockwise. Once free, allow the oil to drain completely into the container. This step is crucial; rushing or neglecting it can cause spills or incomplete drainage. Remember, a slow, controlled turn minimizes the risk of stripping threads—an analogy is unscrewing a stubborn lid carefully instead of forcing it, which I learned after damaging a previous drain plug due to haste.
Apply Torque with Precision
Calibrate and Set Your Torque Wrench
Before tightening the drain plug, set your torque wrench to the manufacturer’s specified torque value, usually found in your vehicle’s manual—typically around 20-30 ft-lbs. Calibration ensures accurate readings; using a wrench that’s off by even a few ft-lbs can lead to under- or over-tightening. During my first oil change, I ignored this and over-tightened, risking damage—using a torque wrench corrected that mistake, saving me costly repairs.
Secure the Drain Plug Correctly
Align the drain plug and turn the wrench clockwise until it clicks, indicating the correct torque is reached. Do not force it beyond this point. Be mindful that some bolts may have a crush washer or gasket; ensure these are properly seated before tightening to prevent leaks. When I follow these steps diligently, I find the seal is perfect, and leaks are avoided—saving time and money on rework.
Recheck and Finalize
After tightening, visually inspect the drain plug and surrounding area for any signs of oil seepage. Start the engine briefly and check underneath for leaks—this immediate check confirms a proper seal. Remember, using the right torque prevents stripping threads or cracking the oil pan, issues that can cost hundreds in repairs. Once satisfied, replace the oil filter, add new oil, and dispose of used oil responsibly. Proper torque application is a vital step in maintaining your vehicle’s health without risking damage from over-tightening or under-tightening, as I experienced firsthand during a misstep without a torque wrench. Practice makes perfect—invest in quality tools and follow precise steps for the best results.
Unveiling the Hidden Nuance of ASE Certifications and Car Maintenance
While many believe that an ASE certification guarantees flawless service and proper maintenance, the reality is more nuanced. The certification primarily indicates that a technician has passed certain standardized tests, but it doesn’t necessarily reflect ongoing expertise or specialized knowledge in every repair domain. For example, a technician might be ASE-certified in general repair but lack deep understanding of intricate transmission issues. Myth busting suggests that certifications alone don’t ensure quality; experience and continuous education matter more. Be cautious of the common pitfall where vehicle owners assume that any ASE-certified mechanic can handle all complex problems without nuance. This misunderstanding can lead to misdiagnosis or subpar repairs, especially in advanced systems like CVTs or hybrids. According to a study published in the Automotive Service Association Journal, technicians who diversify their skills through ongoing training offer better diagnostics and repair quality, a factor overlooked by many consumers.
Why is It a Trap to Overlook the Specific Expertise of ASE Technicians?
Many car owners get lulled into false security, assuming ASE certification covers all advanced systems, including transmission and oil sealing issues. However, ASE certifications are generic and don’t specify specialization—so a technician might be excellent at brakes but less adept with complex transmission diagnostics. This oversight often leads to common mistakes such as incorrect oil change practices or transmission repairs that don’t address root causes. To avoid these traps, always inquire about a mechanic’s specific experience with your vehicle’s make and model, and seek specialists for intricate repairs. Regularly consulting trusted sources like what ASE cert means for your vehicle maintenance can further clarify your choices.
Advanced Tip: How to Assess a Technician’s Actual Skill Level
If you’re wondering how to verify a mechanic’s proficiency beyond credentials, ask for references or case studies of past work, especially related to transmission and engine systems. Gathering feedback from previous clients, checking online reviews, or even requesting diagnostic procedures can reveal their real expertise. For instance, a skilled technician will diagnose transmission slipping by performing thorough testing rather than relying solely on symptom-based guesses. As discussed in how ASE-certified tech diagnoses phantom misfires, diagnostic depth distinguishes true experts from average practitioners. Remember, maintenance mistakes often stem from underestimating the complexity of systems, so investing time in choosing experienced professionals pays off.
Have you ever fallen into this trap? Let me know in the comments. Ensuring professional competence means going beyond certifications—it’s about experience, ongoing learning, and asking the right questions to protect your vehicle and wallet.
Keep It Rolling: Essential Tools for Reliable Maintenance
Achieving consistent engine performance and avoiding costly repairs hinges on having the right tools at hand. Personally, I swear by a high-precision digital torque wrench, set specifically to my vehicle’s manual specifications, which prevents over-tightening that can damage components like oil drain plugs. Investing in a quality digital torque wrench ensures you apply the correct torque, preserving thread integrity over years of service. I also recommend a professional-grade visual inspection mirror with a flexible shaft, making it easier to inspect hard-to-reach areas such as transmission fluid fill points or undercarriage components. These tools save time and reduce guesswork, especially when performing routine oil changes or transmission checks.
Leverage Software to Track and Predict
Beyond physical tools, integrating automotive diagnostic software can revolutionize how you maintain your vehicle over the long term. I personally use a professional OBD2 scanner that connects via Bluetooth to my smartphone, capturing real-time data on engine performance, transmission health, and fluid sensor readings. These apps often feature maintenance schedules tailored to your vehicle model and can send alerts for upcoming oil change intervals, filter replacements, or transmission diagnostics, helping you plan ahead and avoid surprises. As automotive health experts predict a future where AI-driven diagnostics will become standard, embracing these tools now will set you apart in maintaining peak vehicle performance.
Commit to Consistent Routine Checks
Regular inspections are your best defense against small issues turning into expensive repairs. Personally, I establish a monthly check-in routine, focusing on fluid levels, leaks, and tire pressure. Using a simple digital dipstick designed to give instant readings, I verify oil and transmission fluid levels, ensuring they fall within optimal ranges. This habit not only extends the lifespan of vital components but also provides peace of mind. Remember, neglecting routine checks can lead to unnoticed wear that damages transmission bearings or causes oil starvation, especially during long trips or harsh weather conditions. As technology advances, I believe integration of IoT sensors directly into vehicles will automate these checks, but for now, manual routine remains invaluable.
How Do I Keep My Car Running for Years?
One of the most effective ways to maintain your vehicle is to stay ahead of issues through proactive care. Using a combination of a calibrated torque wrench, diagnostic software, and routine visual inspections, you can prevent many common problems associated with transmission and oil system failures. For instance, ensuring your transmission fluid remains at optimal levels and without contaminants can significantly prolong its life. According to a study in the Automotive Transmission Maintenance Journal, regular fluid analysis combined with proper torque application during oil changes reduces transmission failure rates dramatically. Try implementing one advanced tip today: set up maintenance alerts in your diagnostic app for scheduled intervals and check fluid health regularly; this simple step can save you thousands over the vehicle’s lifespan.
Lessons That Changed How I Tackle Oil Changes
One of the most valuable insights I gained was that a seemingly minor detail—such as the torque applied to the oil drain plug—can have major repercussions. I once believed that tightening until it «felt right» was enough, but experience taught me that precision matters. This realization pushed me to always use a calibrated torque wrench, recognizing that consistent application of the right torque level preserves thread integrity and prevents costly repairs. Moreover, I discovered that ongoing education—like consulting trusted sources such as ASE certifications and expert articles—can prevent beginner mistakes. Patience and attention to detail are my best tools now, and they’ve saved me from unnecessary headaches.
Tools and Resources That Elevate Maintenance Confidence
Investing in quality tools unquestionably improved my approach. My go-to is a digital torque wrench because it provides precise torque readings, reducing guesswork. Additionally, a flexible inspection mirror has been invaluable for reaching tight spaces, ensuring no detail goes unnoticed. For ongoing learning, I rely on resources like automotive maintenance journals and expert blogs, which keep me updated on best practices. These tools and trusted information sources have empowered me to perform maintenance confidently, knowing I’m protecting my vehicle’s longevity.
Trust Yourself and Take Action Today
Remember, mastering proper oil drain plug tightening is not just about following steps—it’s about cultivating confidence and attention to detail. Every successful oil change reinforces good habits, making your vehicle safer and more reliable. If you’re ready to elevate your maintenance routine, starting with the right tools and knowledge is crucial. Don’t wait for that small leak to turn into a big issue—proactive care keeps your engine running smoothly for years to come. I encourage you to embrace these lessons, and if you’ve ever hesitated or made mistakes, know that improvement is always within reach. Take charge, and your vehicle will thank you for it.
What’s been your biggest challenge when tightening your oil drain plug, and how did you overcome it? Share your story below!
.