How to diagnose a bad alternator with a simple multimeter
It was one of those mornings where everything that could go wrong did. I turned the key, and instead of that reliable hum of my engine firing up smoothly, I was met with a sluggish cranking sound. My dashboard lights flickered like a strobe light at a party, and I knew—something was off. Frustration bubbled up as I realized my car’s electrical system was failing, and I had no idea where to start troubleshooting. That’s when I had my lightbulb moment: I needed to check my alternator, but I didn’t want to spend a hundred bucks on a mechanic just yet.
Why Checking Your Alternator Can Save You Big Time
Understanding how to diagnose a bad alternator with a simple multimeter isn’t just for seasoned gearheads; it’s a small skill that can save you from being stranded or spending unnecessary money. When your alternator begins to fail, it can’t keep your battery charged, leading to weird dashboard lights, dead batteries, and sometimes, a stalled engine. Early detection is key, and the best part? You can perform a quick test yourself with just a cheap multimeter from the auto parts store. I’ve been there—relying solely on mechanic visits without knowing what was really wrong. Turns out, an alternator can often be diagnosed accurately without fancy tools or dealership prices, saving me both time and cash.
Will a Multimeter Actually Do the Job?
Early in my troubleshooting journey, I made the mistake of assuming that all multimeters are created equal. I used a cheap one that barely read voltage accurately, and I wound up misdiagnosing my problem, leading to unnecessary replacements. That taught me a valuable lesson: invest in a decent multimeter, and learn how to use it properly. An ASE-certified technician will tell you that voltage readings and understanding clues in your vehicle’s electrical system are essential for proper diagnosis. With a little patience and some guidance, you can become proficient at reading your alternator’s health in minutes.
If you’ve ever faced the dread of a sudden vehicle failure or wonder whether that warning light is a sign of something serious, keep reading. We’ll walk through a simple, step-by-step process to test your alternator with a multimeter, so you can decide if professional help is needed or if you can DIY your way out of trouble. Don’t wait until your car leaves you stranded—taking quick action can save you both money and frustration. So, are you ready to learn how to diagnose that noisy, blinking battery warning with a tool you probably already have in your garage? Let’s get started!
Set Up Your Multimeter Correctly for the Test
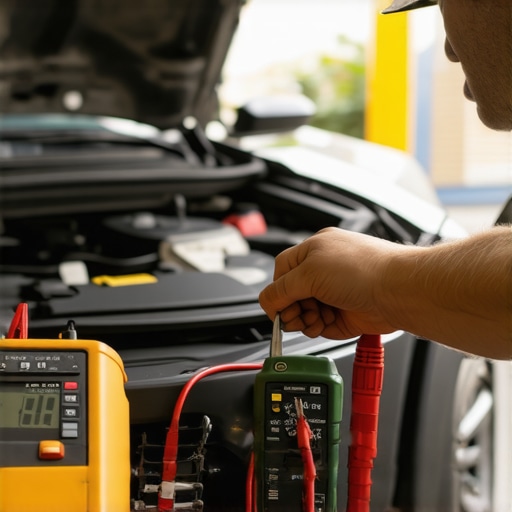
Begin by turning off your vehicle and opening the hood to access the battery. Set your multimeter to measure voltage in the 20V DC range. I once forgot to switch from resistance mode, which gave me a confusing reading and unnecessary worry — always double-check your multimeter settings before testing. Place the black probe on the negative terminal of the battery and the red probe on the positive terminal. You should get a static reading around 12.6 volts in a healthy, off-state car. If your multimeter shows significantly lower voltage, it signals your battery might be drained, but don’t jump to conclusions just yet.
Start Your Car and Measure Charging Voltage
With the engine running, keep the probes in place and read the voltage again. A healthy alternator will produce between 13.8 and 14.8 volts, indicating it’s charging the battery correctly. During my initial attempt, I saw a reading of only 12.4 volts with the engine running — a clear sign my alternator wasn’t charging properly. I immediately decided to test further rather than guessing, saving me money and getting back on the road faster. If your voltage exceeds 15V, it might be overcharging, which can damage your battery and electrical systems.
Check for Fluctuations While Revving the Engine
Rev the engine gently to about 2000 rpm and observe any change in voltage. A stable reading that stays within 13.8–14.8V suggests a healthy alternator. If the voltage dips or spikes erratically, your alternator or its voltage regulator may be failing. I recall once my voltage surged up to 16V upon revving — a sign that the voltage regulator was malfunctioning, just like a faulty transmission that jumps gears unexpectedly. Replacing the regulator or alternator can resolve this quickly and prevent stranded situations.
Perform a Light Load Test
Turn on electrical accessories like headlights, defrosters, and radio. Keep an eye on the multimeter reading as you do this. The voltage should remain within the acceptable range and not drop significantly. During one test, turning on the headlights caused the voltage to plummet below 13V, indicating your alternator is struggling to keep up. This is like trying to push a heavy load with a weak transmission — it just isn’t designed to handle the extra stress. If you see such results, it’s time to consider replacing the alternator or seeking professional diagnostics.
Test the Battery Directly
Finally, check the battery’s own voltage with the engine off. A reading below 12.4V indicates a discharged or bad battery. This is similar to how a transmission fluid level or oil quality can affect overall performance — always verify the basics first. If your battery readings are fine but the charging voltage is low during running tests, the issue lies with the alternator. For ongoing reliability, consider regular oil changes and scheduling checkups at a trusted shop, especially if your vehicle has seen high mileage or rough conditions.
By following these straightforward steps, you can quickly gauge the health of your alternator without needing expensive equipment or expert help. Remember, early diagnosis can save you from roadside breakdowns, and understanding your vehicle’s electrical system arms you with the confidence to handle minor troubles yourself.
Many car owners believe they fully understand their vehicle’s maintenance, but in reality, misconceptions and overlooked details can hurt performance and longevity. Let’s examine some of the most common misconceptions and reveal the nuances that often go unnoticed. While everyone talks about the importance of regular oil changes, few realize that not all oil changes are equal. For instance, mixing different brands or types of oil without proper knowledge can lead to increased engine wear, especially in high-mileage or turbocharged engines where oil quality plays a crucial role. Additionally, many overlook the significance of verifying whether an ASE-certified technician truly specializes in their vehicle’s make and model. An ASE certification indicates a broad competency, but specialized training accessorized with manufacturer-specific knowledge is what ensures top-tier service. Don’t assume all ASE-certified pros are experts in every niche—it’s essential to verify their expertise for your specific needs.
Why do some transmission repairs fail prematurely despite proper maintenance?
The transmission is one of the most complex parts of your vehicle, and many assume that regular fluid changes and inspections are sufficient. However, a common mistake is neglecting the specific type of transmission fluid required for your car. Using the wrong fluid or neglecting to replace worn torque converters or solenoids can lead to early failure. An expert from our team cautions that neglecting the specific maintenance intervals for your transmission, especially in high-performance or luxury vehicles, can cause issues that simple fluid changes won’t fix—sometimes you need a comprehensive diagnostic and targeted repairs. Learning the subtle signs of transmission slipping or shuddering can save you thousands in repairs. Proper service tailored to your vehicle’s unique requirements, like the advanced procedures we provide, can significantly enhance longevity. Want to learn more about choosing the right car service? Check out our guide on selecting the right service for your vehicle. Remember, avoiding common pitfalls like assuming a quick oil change suffices for high-mileage engines or relying on unverified technicians can cause long-term damage. Always seek a trusted professional who combines proper training,-up-to-date knowledge, and attention to detail. To ensure your car’s health, consider consulting experts who are not just ASE-certified but also possess specialization in your vehicle’s make. Reach out to us for personalized advice or to schedule an in-depth service at our contact page. Have you ever fallen into this trap? Let me know in the comments.
How Do I Keep My Transmission Running Smoothly Over Time
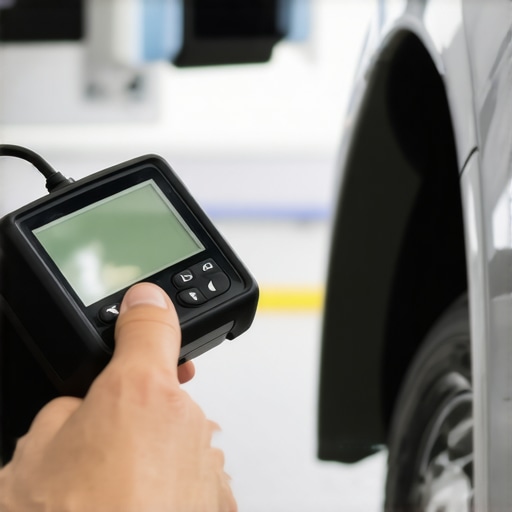
Maintaining your transmission is a continuous process that benefits from the right tools and a disciplined approach. One essential tool I rely on is a high-quality OBD-II scanner that integrates with smartphone apps like Torque Pro. This device allows me to monitor real-time transmission fluid temperature, shift patterns, and error codes from the comfort of my garage, giving me early warning signs before a small issue becomes costly. I specifically prefer models that support live data streaming and customizable alerts, ensuring I catch anomalies like slipping or delayed shifts early—saving me from unexpected breakdowns and expensive repairs. Regular digital diagnostics complement manual inspections, extending your transmission’s lifespan and optimizing its performance.
Another tool I swear by is a professional-grade transmission fluid tester. It helps verify if your fluid maintains the correct viscosity and doesn’t contain debris or foam, which could indicate internal wear or contamination. Using this, I can determine when a fluid change is truly necessary and avoid premature replacements. Remember, not all transmission issues stem from fluid alone; internal components like solenoids and torque converters require specialized diagnostic procedures, often performed at an ASE-certified shop.
Investing in quality tools and staying proactive can prevent transmission problems from escalating. As vehicles become more sophisticated, integrating diagnostics with advanced software trends—such as predictive maintenance algorithms—will soon become standard. This approach allows for remote monitoring and scheduling repairs before breakdowns happen, saving you money and downtime.
How do I maintain transmission health over time without constant expert visits?
The key lies in a routine that combines regular checks with the right equipment. Set reminders for oil and fluid changes and utilize diagnostic tools to track shifts and fluid quality. Additionally, keeping an eye on the symptoms like unusual noises or hard shifting episodes can be early indicators of trouble—addressing them promptly with the proper tools can extend your transmission’s service life significantly.
Looking ahead, I believe that the trend will favor more integrated, IoT-enabled maintenance solutions that automatically alert owners and mechanics about impending issues through vehicle telematics. This shift will make transmission maintenance more precise and less reactive, potentially transforming how we care for our vehicles long-term. For now, I recommend trying the advanced diagnostic methods I’ve described; they’re the proactive step that can save you hundreds down the road. To get started, pick up a reliable OBD-II scanner compatible with your vehicle and learn how to interpret the live data—investment in knowledge pays the best interest.
Three Lessons That Changed My Approach to Car Care Forever
One of the most valuable insights I gained was realizing that not all maintenance tasks are created equal—skipping or rushing through simple checks can lead to costly repairs down the road. I also learned the importance of trusting well-trained, ASE-certified technicians who comprehend the nuances of your specific vehicle model, rather than relying solely on generalists or cheap fixes. Lastly, I discovered that arming myself with basic diagnostic tools, like a quality multimeter or an OBD-II scanner, empowers me to catch small issues before they escalate, saving both time and money.
Hands-On Resources That Transformed My Maintenance Routine
For anyone serious about vehicle longevity, I recommend investing in a reliable ASE-certified diagnostic tool—it provides peace of mind by identifying problems early. The top oil change tips guide is also a game-changer, ensuring I use the right type of oil and filters at proper intervals. Additionally, I trust the expertise shared in transmission troubleshooting articles; they help me understand subtle signs of trouble and when to seek professional service. These resources have truly transformed my approach from reactive to proactive maintenance.
Keep Your Car Dreams Alive and Your Engine Happy
Don’t wait for the next breakdown to take action—your vehicle’s health depends on the care you give it today. With a little knowledge, the right tools, and a proactive mindset, you can extend your car’s lifespan, improve safety, and enjoy worry-free driving. Remember, every effort you make now pays dividends in reliability and peace of mind. So, why not start implementing these tips today? Your future self will thank you.