How to Clean Your Engine Bay Without Shorting the Electrics
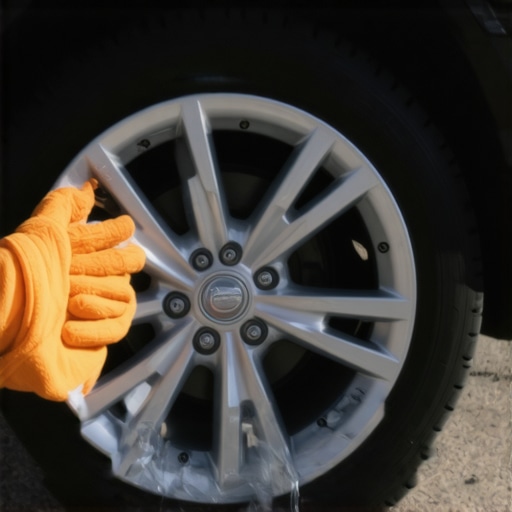
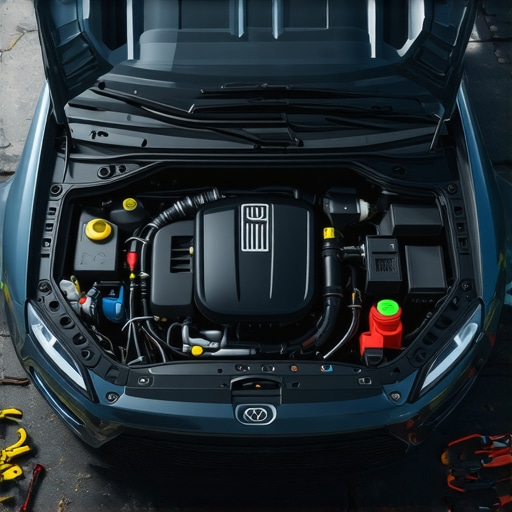
It was a sunny Saturday afternoon when I finally decided to give my car a thorough engine bay clean. I thought, how hard could it be? A quick spray, wipe down, and I’d be set. But within minutes, I had sparks flying—literally. A misstep in my haste risked frying my car’s delicate electronics, and I learned a costly lesson the hard way. That experience became my lightbulb moment: understanding how to safely clean an engine bay without risking short circuits or electrical damage.
Many car owners, myself included, want their vehicles to look sharp—no greasy grime or salt deposits marring that sleek engine compartment. But the fear of damaging sensitive electronics, like sensors, wiring harnesses, and connectors, often keeps folks from doing it themselves. The good news? With the right techniques, knowledge, and a bit of patience, you can keep your engine bay spotless without risking a short or an expensive repair.
Today, I’ll share proven tips and strategies based on personal experience to help you safely clean your engine bay. Whether you’re prepping your car for a show or just want to keep it looking fresh, these methods will help you avoid the common pitfalls that cause electrical mishaps.
Why Proper Engine Bay Cleaning Matters
Keeping your engine bay clean isn’t just about aesthetics. A dirt-free engine runs cooler, which can improve efficiency and longevity. Plus, spotting leaks or worn components becomes easier when the area is free of grime. Regular cleaning can even help you catch early signs of mechanical issues before they become costly repairs.
However, many car owners overlook the risks involved. As I initially did, they might spray with abandon, ignoring the electrical components that are vulnerable to moisture and improper cleaning techniques. An early mistake I made was using a high-pressure hose—thinking more force would clean better. Instead, I ended up forcing water into connectors, which later caused trouble starting the engine. That’s when I realized: knowing how to clean safely is as crucial as the cleaning itself.
If you’re curious whether your approach might be risking electrical damage, I recommend checking out expert insights on the topic. For example, [this article](https://autofixclinic.com/the-truth-about-engine-degreasers-and-sensitive-electronics) offers valuable tips on choosing the right cleaning products and techniques.
Now that we understand the importance and the risks, let’s dive into the practical steps to perform a safe, effective engine bay cleaning. Ready to get your hands dirty the right way? Let’s go!
Protect Your Electronics Before You Spray
Start by disconnecting the car battery to prevent any accidental shorts. I learned this the hard way when I forgot and my dashboard lights flickered after cleaning. To do this, locate the negative terminal, loosen the clamp with a wrench, and remove the cable. Make sure to keep it away from the battery to avoid any sparks or accidental contact. Think of it like unplugging your phone before cleaning its screen—prevents unnecessary damage.
Gather the Right Tools and Supplies
Use a dedicated engine degreaser, a soft-bristle brush, microfiber towels, and a low-pressure hose or spray bottle. Avoid high-pressure washers—they can force water into sensitive connectors. In my experience, a garden sprayer filled with degreaser allowed me to control the spray and target stubborn grime without risking electrical damage. Remember, the goal is to loosen dirt without bombarding your engine with too much water.
Apply Degreaser with Precision
Spray the degreaser liberally on greasy surfaces, avoiding electrical components, sensors, and air intakes. Let it sit for 5-10 minutes to break down oil and dirt. During a previous attempt, I mistook this step for a quick rinse, but patience pays off—wait enough time for the product to work effectively. Use a rag to wipe away loose debris and excess cleaner to keep the area manageable.
Use Gentle Brushing to Lift Grime
Employ a soft-bristle brush to scrub away stubborn deposits. Focus on the firewall and valve covers, but be gentle around wiring and sensors. I once used a metal wire brush, which scratched plastic components and made the engine look worse. Think of brushing as similar to cleaning delicate jewelry—gentle but effective.
Rinse Carefully with Low Pressure
Rinse your engine using a low-pressure spray or a damp microfiber cloth. Keep the water spray targeted and avoid direct streams at electrical parts. I remember accidentally spraying water directly onto connectors, which caused short issues later. Think of this like watering a potted plant—you want moisture, not a flood.
Dry Thoroughly to Prevent Moisture Accumulation
Use clean microfiber towels to dry all accessible surfaces, paying special attention to wiring harnesses and connectors. I found that a blow dryer on a cool setting helped remove residual moisture from tight spots. Think of drying like wiping sweat from your brow—comprehensive and gentle to prevent any lingering dampness that could cause corrosion.
Reconnect the Battery and Check
Once everything is dry, reconnect the negative terminal, tighten the clamp securely, and start the engine. Observe for any warning lights or irregular behavior. If issues arise, consult an ASE certified mechanic, like those at AutoFix Clinic, to ensure electrical components remain intact. Proper reconnecting is like plugging in a device correctly—necessary for smooth operation.
Additional Tips for Success
Use non-corrosive contact cleaners for connectors, and avoid oversaturating any area. Also, consider doing this on a cool, overcast day to prevent rapid drying and potential water spots. Remember, patience and precision are key; rushing can undo all your careful work and lead to costly repairs. By following these steps, you can keep your engine bay looking sharp while avoiding the pitfalls that come with improper cleaning.
When it comes to vehicle upkeep, many car owners have misconceptions about the significance of ASE certification and common service practices like oil changes and transmission repairs. While certifications and routine maintenance are essential, there’s a nuanced understanding often overlooked, leading to costly mistakes. Let’s explore these hidden pitfalls that even seasoned DIYers and some professionals might unknowingly fall into.
First, the myth that ASE certification guarantees a mechanic’s expertise is widespread. While ASE certification indicates a certain level of knowledge, it doesn’t necessarily reflect practical skills or honesty. Some shops may prioritize certifications to attract trust without emphasizing actual hands-on proficiency. Therefore, **trustworthiness and experience must go beyond just ASE badges**. For instance, check how a shop performs diagnostic tests — you can verify their expertise by reviewing their diagnostic process [here](https://autofixclinic.com/how-to-spot-an-ase-certified-tech-who-actually-knows-your-car).
Another common misconception is that a simple oil change is largely insignificant or can be postponed without consequence. Many owners believe that oil is just a lubricant and that routine changes are optional, but recent studies highlight that neglected oil can lead to engine wear, corrosion, and eventual failure. In fact, **skipping or delaying oil changes accelerates engine breakdown and reduces overall lifespan** — which is why maintaining a regular schedule is critical, as discussed in [this article](https://autofixclinic.com/why-regular-oil-changes-extend-your-cars-lifespan).
An advanced mistake many overlook involves transmission maintenance. Some assume that slipping or rough shifts are purely mechanical issues, ignoring the impact of hydraulic fluid quality. Dirty or low transmission fluid can cause gear slipping, shuddering, or even transmission failure. Interestingly, **transmission fluid deteriorates faster than most expect, especially in high-mileage or heavily used vehicles**, and proactive fluid checks can prevent expensive rebuilds. For detailed advice on avoiding transmission problems, see [here](https://autofixclinic.com/transmission-troubles-expert-insights-for-smooth-shifting).
Are you aware that many car owners neglect the importance of proper service intervals for high-mileage vehicles? It’s a trap that leads to excessive wear, especially in critical components like the clutch, differential, and cooling systems. Regular professional inspections can reveal issues early, saving you thousands in repairs later. Remember, **adhering to manufacturer-recommended service schedules isn’t just about compliance; it’s about preserving your vehicle’s value and safety**.
Finally, to add a layer of nuance, one often overlooked factor is the quality of parts used during repairs. Cheap, generic parts may save money upfront but often fail prematurely, leading to recurrent issues. A reputable shop that invests in quality parts and up-to-date diagnostics ensures longevity and reliability. To corroborate this, consult [this resource](https://autofixclinic.com/how-to-verify-a-shops-ase-status-without-asking-the-manager).
In sum, understanding the nuances behind ASE certification, routine services, and trusted maintenance practices helps you make smarter decisions. Don’t be complacent with assumptions; instead, ask your mechanic about their diagnostic process, service intervals, and parts quality. This knowledge can prevent you from falling into costly traps. Have you ever fallen into this trap? Let me know in the comments.Maintaining your vehicle’s optimal performance demands the right tools, precise methods, and a strategic approach that evolves with technology. As vehicles become more sophisticated, so must our maintenance routines. From advanced diagnostic software to specialized hand tools, investing in quality equipment not only saves you time but also ensures accuracy and safety during repairs and preventive measures. In my experience, the first step is always a reliable automotive scan tool, like the Autel MaxiCOM series. Its extensive vehicle coverage and user-friendly interface allow me to diagnose electrical issues quickly, preventing minor faults from escalating into costly repairs. For instance, proper transmission diagnostics require specific tools that can read manufacturer-specific codes, which generic scanners often overlook. You can explore expert insights on choosing the right diagnostic tools [here](https://autofixclinic.com/how-to-verify-a-shops-ase-status-without-asking-the-manager). Beyond diagnostics, regular maintenance products such as synthetic oils, high-quality filters, and corrosion inhibitors are essential. I prefer synthetic oils with low-temperature viscosity for colder months, as they improve cold starts and engine longevity. Using tools like a magnetic oil drain plug ensures quick removal of debris during oil changes, helping me keep the engine clean and efficient. To keep your vehicle running long-term, consider modular emergency repair kits that include jumper cables, a portable air compressor, and a basic assortment of wrenches and pliers. These can be lifesavers when unexpected issues arise on the road. Looking ahead, automation and AI-driven diagnostic platforms are predicted to revolutionize car maintenance further, offering real-time alerts and proactive recommendations. Embracing these innovations early will position you ahead of the curve and extend your vehicle’s lifespan.
How do I maintain tools and software over time?
Regular calibration of diagnostic equipment and cleaning of hand tools are crucial to prevent inaccuracies and wear that can compromise repairs. Keep your software updated via official manufacturer websites to ensure compatibility with the latest vehicle models. Maintaining your tools diligently enhances their lifespan and reliability, directly impacting your car’s performance and safety. Don’t hesitate to try upgrading to a professional-grade scan tool or adding a high-end torque wrench, as these investments streamline repairs and improve outcomes. Remember, a well-maintained toolkit is the backbone of effective vehicle care. For comprehensive maintenance tips, visit our [contact page](https://autofixclinic.com/contact-us) and start elevating your car servicing routine today.
Three Surprising Truths I Only Learned Through Mistakes
One lesson I wish I had embraced from the start is that ASE certification isn’t a silver bullet. Early on, I trusted shops solely based on their badges, but I soon realized that real expertise comes from experience and honest diagnostic work. Another eye-opener was realizing that delaying routine oil changes can silently destroy your engine over time, even if it runs smoothly today. The third revelation was that high-quality parts and proper maintenance are the backbone of longevity; cutting corners here often leads to bigger expenses down the line.
The Tools and Resources That Changed My Car Care Game
My essential toolkit includes a reliable automotive scan tool like the Autel MaxiCOM series because accurate diagnostics save time and rebuilds. I also rely on trusted literature such as resources emphasizing routine maintenance to stay informed. For better service quality, I consult professional forums and expert blogs, which keep me ahead of the latest tech and repair techniques. Never underestimate the power of good diagnostic software combined with quality tools — they are your best allies in vehicle maintenance.
Your Move: Elevate Your Vehicle Care Now
Remember, mastery in car servicing isn’t just about tools; it’s about your commitment to continuous learning and proactive upkeep. By understanding the nuances of ASE certifications, oil change intervals, and transmission care, you’ll avoid common pitfalls and extend your vehicle’s lifespan. Take action today — start asking questions, research your service providers, and invest in quality parts and diagnostics. Your car will thank you, and so will your wallet. What specific car care challenge have you faced that changed your perspective? Share below and let’s learn together!