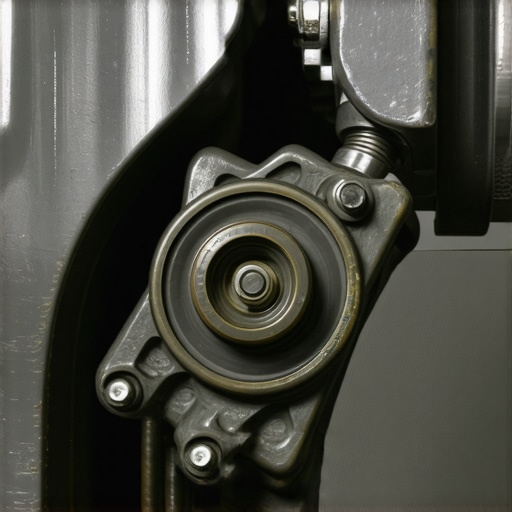
Your brakes are hissing because of this tiny rubber seal
It was a chilly Saturday morning when I first noticed that unmistakable hiss coming from my car’s wheels. Not the usual brake squeal, but a sharp, persistent sigh that made me stop mid-drive. At first, I thought it was just some dust or debris. But that sound persisted, growing louder with every application of the brake pedal. Turns out, that tiny rubber seal I’d ignored during my last DIY brake service was the culprit. That moment was a lightbulb for me—how such a small component could cause so much noise and concern.
The Sound of a Tiny Rubber Seal Failing
When your brakes start hissing unexpectedly, it’s often a sign that a small but vital part has given up. The culprit is frequently the rubber seal within your caliper or master cylinder. These seals are designed to prevent brake fluid leaks and keep contaminants out. Over time, exposure to moisture, heat, and repeated pressure can cause these seals to deteriorate. Once compromised, they allow air to enter the hydraulic system, which causes that eerie hissing sound—like your brakes are protesting.
I remember updating the brake fluid during a routine oil change (learn why regular oil changes are essential [here](https://autofixclinic.com/why-regular-oil-changes-extend-your-cars-lifespan)), only to find after a few weeks that my brakes squealed and hissed. That’s when I realized that I’d overlooked the rubber seals—those tiny O-rings that often get ignored because they’re hidden or considered insignificant. It was a classic mistake early on that many DIY enthusiasts make. Instead of rushing to replace the entire caliper, I learned that a simple seal replacement can often restore quiet and reliable braking.
Have you ever experienced that unsettling change in your brake noise, only to dismiss it as minor? Well, that’s a dangerous trap, and ignoring it can lead to more costly repairs down the road. Understanding exactly what’s happening inside your brake system can save you both money and peace of mind.
Is Fixing That Rubber Seal Actually Worth It?
Many skeptics wonder if fiddling with tiny rubber parts is worth the hassle—especially when a mechanic might suggest replacing the entire caliper. But from my experience, addressing these seals early on is a smart move. Not only does it prevent leaks and brake failure, but it also extends the lifespan of your braking components.
In fact, neglecting small issues like a worn seal can escalate into uneven brake pad wear, reduced stopping power, and even damage to the master cylinder. Early intervention is key—plus, it’s often a quick, affordable fix if you know what to look for.
There’s a common misconception that all brake noises are related to worn pads or rotors. But tiny rubber seal issues are just as critical. If you’ve heard that sizzle or hiss while braking, it’s time to investigate. Check out how to diagnose brake problems in my related posts [here](https://autofixclinic.com/stop-ignoring-that-burning-rubber-smell-after-long-drives) and [here](https://autofixclinic.com/the-hidden-cost-of-skipping-your-60000-mile-service). Trust me, addressing these small components can prevent big headaches.
Next, I’ll guide you through the practical steps to identify, inspect, and replace those elusive rubber seals without turning your garage into a workshop nightmare. Ready to get your brakes whisper-quiet again? Let’s dive in.
Gather Your Tools and Supplies
Start by assembling the necessary tools: a jack, jack stands, a lug wrench, brake caliper piston tool, screwdrivers, pliers, and fresh rubber seals compatible with your vehicle model. Precise tools minimize damage and make the process smoother. I once attempted this with only a basic wrench, which prolonged the job and caused minor scratches; proper tools make all the difference.
Lift the Vehicle Safely
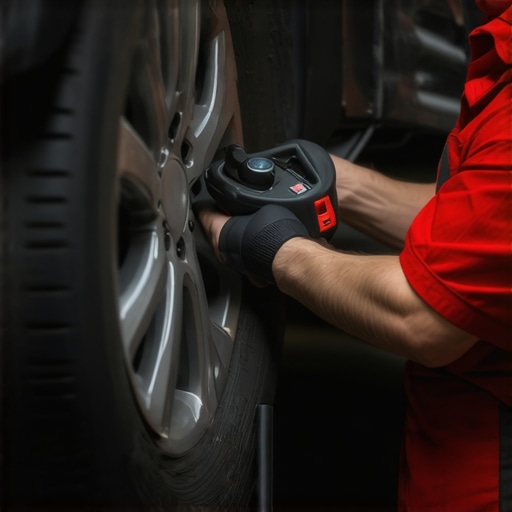
Park on a flat surface, engage the parking brake, and loosen the lug nuts of the wheel with the suspected issue. Use a hydraulic jack to lift the car, then place jack stands securely under the frame. Never rely solely on the jack; your safety depends on proper support. When I did this for the first time, I forgot to chock the wheels, which nearly rolled while I was working—setting wheel chocks is essential.
Remove the Wheel and Caliper
Use the lug wrench to completely remove the lug nuts and take off the wheel. Locate the brake caliper, which houses the rubber seal. Remove the caliper bolts using a wrench, carefully slide the caliper off the rotor, and support it with a bungee cord or a piece of wire to avoid stressing the brake hose. During my initial attempt, I didn’t support the caliper, causing strain on the brake line; securing it prevents damage.
Extract the Old Seal and Prepare the Area
Inside the caliper, locate the rubber seal. Use a pick or flat-head screwdriver to carefully pry it out, avoiding damage to the caliper housing. Clean the chamber thoroughly with brake cleaner, removing any debris or corrosion. I once skipped cleaning, which led to contamination and quick seal failure; meticulous cleaning ensures longevity.
Inspect the Caliper and Piston
Check for uneven wear or corrosion. If the piston has excessive corrosion or pitting, consider replacing the entire caliper. For minor pitting, a light polishing can sometimes suffice. During one repair, neglecting piston inspection resulted in a squeal later—a reminder to assess all components thoroughly.
Install the New Seal
Lubricate the new rubber seal with brake fluid or high-temperature brake grease to facilitate installation. Carefully press the seal into the caliper chamber, ensuring it sits flush and properly aligned. Misaligned seals can cause leaks or uneven braking, so take your time. I once forced a seal, causing tearing; gentle, steady pressure is key.
Reassemble the Caliper and Wheel
Gently push the piston back into the caliper using the piston tool, and then replace the caliper onto the rotor. Secure with bolts, tightening them to the manufacturer’s torque specifications. Mount the wheel, tighten the lug nuts by hand, then lower the vehicle from the jack stands and fully torque the lug nuts. Checking torque prevents wheel loosening. After my first install, I forgot to torque the lug nuts, which I later found to be a risky oversight.
Test Drive and Confirm Fix
Before resuming normal driving, pump the brake pedal several times to seat the new seal and piston. Perform a short, cautious test drive to ensure everything operates smoothly. Listen for unusual sounds or vibrations. On my first attempt, I noticed a slight pulsation, which I traced back to uneven caliper assembly—attention to detail avoids rework.
Remember, regular maintenance and inspections can catch issues like failing rubber seals early, preventing costly repairs. For ongoing vehicle health tips, explore posts on why regular oil changes extend your car’s lifespan or choosing the right car service.
While many car owners recognize that regular oil changes are vital, there’s a web of misconceptions that can undermine your vehicle’s longevity. A common myth is that all oils and intervals are equal—this oversimplifies the complex chemistry involved in engine lubrication. Advanced users know that synthetic oils and tailored schedules based on driving conditions outperform standardized recommendations. However, many still rely blindly on mileage or time alone, neglecting factors like engine load and climate which critically influence oil degradation.
Another misconception involves ASE certification. It’s often assumed that ASE certification guarantees the mechanic’s competence in every aspect of repair. In reality, ASE certifications are specific to certain areas and levels; a master tech in one domain doesn’t necessarily excel in another. Checking the specific ASE credentials can help ensure your mechanic’s expertise aligns with your vehicle’s needs. For instance, the certification in transmission diagnostics indicates proficiency in diagnosing complex shifting issues, which is a nuanced skill that not all technicians possess. Learn more about what an ASE certification entails here.
Misunderstandings surrounding transmission services often lead to costly mistakes. Many believe that flushing transmission fluid is unnecessary or harmful—a myth debunked by experts. Delayed or avoided transmission fluid changes can cause the buildup of debris and friction modifiers to become ineffective, leading to increased wear and eventual component failure. Regular fluid changes preserve transmission health, especially in high-mileage or heavy-duty vehicles. Discover the hidden costs of neglecting transmission maintenance here.
Beware the trap of relying solely on visual inspections to assess car health. Many overlook the importance of diagnostic tools and sensor data, which reveal subtle issues like early engine wear or sensor failures that aren’t visible to the naked eye. For example, oil pressure warning lights might only activate at idle, misleading owners into thinking their oil levels are fine when, in fact, internal pressure may be dropping under load. Proper diagnostics can prevent breakdowns and extend engine life. For more on interpreting warning signs accurately, see here.
Ask yourself—have you ever fallen into the trap of believing in quick fixes or myths? Recognizing these nuances ensures you’re making informed decisions. If you’re unsure about your current maintenance practices or want personalized advice, don’t hesitate to reach out. Staying ahead with knowledge means fewer surprises on the road and more savings at the repair shop.Maintaining your vehicle efficiently requires the right tools and a disciplined approach. From professional-grade diagnostic scanners to precision hand tools, selecting equipment that ensures accuracy and longevity is critical. I personally rely on a combination of high-quality, ASE-certified tools like the **BlueDriver Bluetooth Professional Diagnostic Scanner**, which provides comprehensive insights into engine codes and live data without the need for costly trips to the shop. This device syncs with my smartphone, making quick diagnostics accessible, and it’s backed by reputable data sources, including detailed technical documentation like the ASE certification standards. For more intricate tasks, I use a **digital torque wrench** from Tekton to ensure bolts are tightened to manufacturer specifications, preventing over-tightening or under-tightening that can lead to long-term issues like leaks or component failure. Regular calibration of these tools is a must—I calibrate my torque wrench annually to maintain precision, which I recommend as a best practice for any serious car owner.
Keeping your tools in tip-top shape extends their lifespan and maintains accuracy. I log tool calibration dates and procedures in a dedicated tracking app, which helps me stay ahead of maintenance schedules. Investing in a **quality brake line pressure tester**, such as the one from Mityvac, allows me to detect leaks and pressure drops in my brake system early—crucial for safety and performance. The future of car maintenance is headed toward smarter diagnostics and automation, with AI-powered tools that can detect subtle issues before they become costly repairs. For example, advanced OBD-II scanners integrated with machine learning algorithms can predict component failures based on data trends, revolutionizing preventive maintenance.
How do I maintain consistent results over time? Regular use of these tools combined with meticulous record-keeping is essential. I document all repairs, inspections, and tool calibrations in a cloud-based journal so I can review trends and spot potential problems early. This proactive approach minimizes downtime and prolongs vehicle life. For ongoing learning and updates, subscribing to industry-standard publications and participating in online forums like the auto maintenance community keeps me informed about the latest methods and tools.
Looking ahead, I predict that the integration of IoT and smart tools will make DIY maintenance even more accessible and precise. Imagine a future where your smartphone alerts you about specific part wear or liquid levels in real time, guiding your repairs step-by-step. To start optimizing your maintenance routine today, try incorporating a **digital torque wrench** coupled with a quality diagnostic scanner. These investments will pay off in increased safety, reliability, and peace of mind. Visit our contact page if you need help choosing the right tools for your vehicle or guidance on setting up your maintenance system.
Lessons Most Mechanics Won’t Share About Brake Seals
One of the hardest lessons I learned was that sometimes, addressing small parts like rubber seals can save you from costly repairs later. I used to overlook these tiny components, believing they weren’t worth the effort until I experienced firsthand how a failing seal could compromise entire braking systems. Now, I know that paying close attention to these details makes a huge difference—think of it as catching the problem before it becomes a crisis.
Another insight I gained is that immediate responses matter. When I first heard that hiss, I dismissed it as minor noise. But ignoring early signs often leads to significant damage or even safety hazards. Learning to trust my intuition and inspecting issues promptly saved me money and kept my vehicle safer. It’s a reminder that sometimes, small indicators are your best allies in vehicle maintenance.
Additionally, I discovered the value of preemptive repairs. Instead of waiting for a full caliper replacement, replacing just the rubber seal turned out to be a quick, economical fix that restored brake quietness. This experience taught me that understanding the function of every part allows me to make smarter decisions—saving time and resources.
Lastly, I realized that DIY can be rewarding but requires patience and knowledge. Doing my own brake seal replacement was intimidating at first, but with proper tools and research, I managed to do it efficiently. The confidence I gained fuels my ongoing learning journey and encourages others to explore maintenance tasks they’re comfortable with, knowing they can make a real difference.