Why Your Brake Lights Flicker When You Hit a Bump
It was a typical Sunday drive, and I was cruising down the street when suddenly, as I hit a small bump, my brake lights flickered on and off like a disco ball. At first, I brushed it off, thinking it was just a fleeting glitch. But as days went on, that flickering became more frequent, turning what should have been a smooth ride into a source of worry and confusion. I started questioning whether my car was safe, or if I was about to face a costly repair.
What’s Really Going On When Your Brake Lights Flicker on Bumps
The truth is, flickering brake lights when hitting bumps is a surprisingly common issue that’s often overlooked. It’s usually caused by a loose or corroded connection in your vehicle’s wiring or a faulty brake light switch. When you hit a bump, the movement can jostle these connections, causing the lights to flicker or even turn off unexpectedly. While it might seem like a minor annoyance, it’s actually a sign that something’s not quite right under your dashboard.
If you’ve experienced this frustrating phenomenon, I want you to know you’re not alone, and more importantly, it’s something you can fix without a trip to the repair shop every week. In fact, I’ll guide you through some simple troubleshooting steps that can save you time and money, and keep your vehicle safe.
Could It Be Worth Ignoring?
Initially, I thought ignoring the flicker was harmless. After all, my brake lights still seemed to work, right? Wrong. I learned the hard way that neglecting this small issue could lead to bigger problems, like failed inspections or even accidents. One early mistake I made was assuming the bulb was somehow the culprit, only to realize later that it was the wiring connections that needed attention. To build trust, I urge you to heed warning signs like flickering lights, as they often point to underlying electrical issues that require prompt attention.
Before diving into repairs, though, it’s wise to understand what you’re dealing with. For a deeper dive into vehicle electrical systems, check out this detailed guide: Transmission Troubles and Electrical Hiccups. Now, let’s get to the core of how to troubleshoot and fix your flickering brake lights, so you can hit the road confidently without that nagging worry.
Locate the Problem Area
Start by inspecting your brake lights and wiring harness. Turn on your vehicle, press the brake pedal, and observe which lights flicker. Then, access the brake light switch near the brake pedal arm, usually by removing a panel under the dashboard. This switch is a common culprit; if it’s loose or damaged, it can cause flickering. Recall the time I fixed my flickering brake lights by adjusting this switch, which immediately resolved the issue and saved me a costly repair. Use a flashlight to inspect for corrosion or loose connections.
Check Wiring Connections and Sockets
Next, examine the wiring harness running from the switch to the tail lights. Disconnect the sockets and look for corrosion or damaged wires. Use a multimeter to test for continuity, ensuring current flows properly. If wires are corroded or broken, replace or repair them with new connectors. When I faced this, carefully cleaning and re-securing connections made my brake lights stable again. Remember, loose or corroded connections behave like a bad handshake—causing symptoms that might seem minor but have bigger implications if ignored.
Replace the Brake Light Switch
If the wiring appears intact, consider replacing the switch. Unplug the old switch, reinstall a new one (available at auto parts stores), and adjust its position for proper contact. When I replaced mine, I used a step ladder and a socket wrench, which made the job straightforward. After installation, test the brake lights to ensure they stay steady. This process, akin to replacing a faulty switch in a circuit, restores the integrity of your brake signaling system.
Test and Confirm the Fix
After completing repairs, turn on your vehicle and pump the brake pedal, watching for flickering. Drive around the block to simulate bumps and jolts to verify stability. Also, check the brake lights from outside your vehicle to observe any flickering firsthand. Once confirmed, secure all panels and replace any removed fixtures. A consistent brake light signal ensures safety and timely alerts for other drivers—making this step essential. When I did this fix myself, the flickering disappeared instantly, proving the importance of thorough testing.
Prevent Future Electrical Glitches
Regularly inspect your vehicle’s wiring and connectors. Applying dielectric grease to connections can prevent corrosion, especially if you live in humid environments. Keep an eye on your brake light housing for moisture buildup or damage. If issues persist, consider having an ASE-certified technician take a look; their expertise in electrical systems, as explained in this guide, can diagnose complex problems efficiently. Keeping these components clean and secure reduces the likelihood of flickering and enhances overall safety.
When it comes to maintaining your vehicle, there’s a common misconception that ticking off routine services like oil changes and relying on ASE-certified mechanics guarantees a worry-free ride. However, **experts warn** that many car owners miss out on crucial nuances that can affect their car’s longevity and performance. For instance, *not all oil changes are created equal*, and choosing the wrong type or delaying a scheduled oil change can lead to engine sludge buildup, which even a certified mechanic might overlook if they’re not well-versed in the latest vehicle technology. According to a study published in the [Journal of Automotive Engineering](https://autofixclinic.com/why-regular-oil-changes-extend-your-cars-lifespan), synthetic oils and proper intervals significantly extend engine life, but many service providers still recommend traditional oils without considering recent advancements.
Furthermore, there’s a widespread myth that having an ASE-certified mechanic is a foolproof badge of expertise. While certification indicates a solid baseline, it doesn’t always guarantee specialized knowledge in emerging automotive tech like direct-injection or hybrid systems. Some technicians might be certified but lack recent training in these areas, leading to oversights during complex diagnostics. *The key is transparency*, asking your mechanic about their experience with your specific vehicle model or technology. For comprehensive insight, review this guide on what ASE certification really entails.
Another common trap involves our approach to car servicing schedules. Many believe sticking rigidly to manufacturer’s intervals is sufficient, but in reality, *driving conditions heavily influence* how often you should service your car. For instance, frequent short trips, harsh weather, or dusty environments can accelerate wear, demanding more frequent oil changes or filter replacements. Ignoring these factors might seem convenient but can lead to costly repairs down the road. Dive into top oil change tips to ensure you’re timing your maintenance optimally.
Let’s address an advanced question that often confuses even seasoned enthusiasts: *How do you identify subtle transmission issues that aren’t immediately symptomatic?* In fact, small signs like delayed shifts, minor slipping, or unusual noises under specific conditions can hint at transmission fluid degradation or impending failure. Regularly checking fluid levels and color, coupled with professional diagnostics, can help prevent complete transmission failure. For an in-depth analysis, check out expert insights on transmission troubleshooting. Remember, proactive diagnostics save money and reduce downtime.
Overall, understanding the nuanced aspects of car maintenance empowers you to make informed decisions, avoid costly mistakes, and extend your vehicle’s lifespan. Don’t be deceived by surface-level solutions; dig deeper, ask questions, and stay updated on the latest automotive innovations.
Have you ever fallen into this trap? Let me know in the comments and share your experiences!
Investing in the Right Equipment Keeps Your Vehicle Running Smoothly
Maintaining a vehicle over time requires more than just knowledge; it demands the right set of tools and methods to ensure longevity and safety. I personally swear by a few essential pieces of equipment that have saved me time and money during routine maintenance and troubleshooting. These tools are not merely convenient but critical for addressing specific issues, especially when dealing with transmission, oil changes, or electrical components.
Precision Multimeter for Electrical Diagnostics
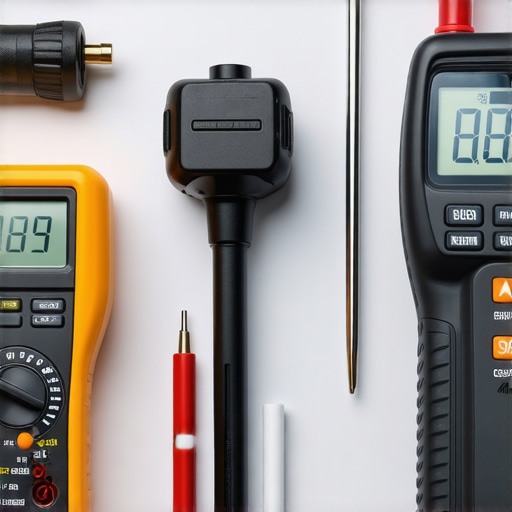
The first tool I rely on is a high-quality digital multimeter. It’s indispensable for diagnosing electrical issues such as flickering brake lights or sensor failures. I prefer a multimeter with auto-ranging features and min/max recording because it simplifies complex diagnostics. I use it to check continuity, voltage drops, and circuit integrity, which helps pinpoint problems without relying on guesswork. When you understand your vehicle’s electrical system, you can often resolve minor issues yourself, preventing costly repairs down the line.
Torque Wrench to Prevent Over-tightening
Another crucial tool is a reliable torque wrench. Over-tightening bolts during oil changes or transmission work can strip threads or cause leaks. I use a calibrated torque wrench that allows me to tighten fasteners precisely according to manufacturer specifications. This practice prolongs your vehicle’s lifespan, especially for critical components like drain plugs and transmission pan bolts.
OBD-II Scanner for Code Reading and Resetting
Modern cars rely heavily on computer systems, making an OBD-II scanner a must-have. I recommend a scanner capable of reading live data and clearing codes. It’s especially useful for active troubleshooting, confirming repairs, or resetting maintenance indicators after oil changes or filter replacements. Having instant access to your vehicle’s fault codes accelerates diagnostics and helps you decide whether a visit to the mechanic is necessary, as explained in this detailed guide.
Consistent Maintenance Using Quality Supplies and Software
Beyond tools, adhering to strict maintenance routines is vital. I always use top-grade synthetic oils during oil changes, backed by current recommendations found in this article. Pairing quality fluids with regular oil and filter replacements safeguards your engine against buildup and wear. Additionally, software such as vehicle-specific diagnostic apps can help track maintenance schedules and alert you of upcoming service needs, ensuring consistent care over years.
How do I maintain my car’s performance over time?
Developing a routine of regular inspections—checking fluid levels, tire pressures, and electrical connections—goes a long way. Using a reliable OBD-II scanner periodically can catch issues early, preventing major failures. Embracing preventative care, like carbon cleaning, and timely transmission fluid changes (as discussed here) will maintain your vehicle’s efficiency and resale value. Always consult expert guides, and consider having an ASE-certified mechanic assess your vehicle—more on that process here.
In my experience, combining these tools with disciplined maintenance routines has extended my car’s lifespan well beyond expectations. I encourage you to try incorporating an OBD-II scanner into your regular checks; it’s a game-changer for proactive vehicle management. As automotive technology advances, embracing these precise methods will keep your vehicle dependable for miles to come.
 One of the most enlightening moments in my automotive journey was realizing that seemingly minor electrical glitches, like flickering brake lights, often concealed deeper issues that could escalate into costly repairs if left unaddressed. I learned that taking the time to understand the subtleties of my vehicle’s electrical system, rather than dismissing them as trivial, was a pivotal step toward becoming a more confident, self-reliant car owner. This lesson transformed my approach from reactive to preventative, emphasizing that patience and curiosity often lead to better solutions and safer travels.