How to Spot an Improperly Installed Transmission Pan Gasket
It was a warm Saturday afternoon when I noticed that telltale puddle forming under my car overnight. I’d just finished a routine oil change at a local shop, trusting their ASE-certified mechanics to handle my transmission service with expertise. But as I looked underneath, I realized something was off—there were signs of a leak, and I knew I needed to act fast. That moment was a lightbulb going off for me: Not all repairs are created equal, especially when it comes to crucial seals like the transmission pan gasket.
Why a Poorly Installed Transmission Pan Gasket Can Cost You Big
A transmission pan gasket might seem like a small part, but it plays a huge role in keeping your transmission fluid sealed and functioning properly. When it’s installed incorrectly, it can lead to leaks, slipping gears, and even transmission failure if left unchecked. I’ve learned through personal experience that catching a faulty gasket early is key to avoiding costly repairs. This is especially important because a lot of DIYers or inexperienced shops might overlook the signs of improper installation, thinking a gasket is just a simple replace-and-forget part. But in reality, the correct installation demands attention to detail.
Have you ever dealt with a mysterious transmission leak right after a service appointment? Or perhaps you’ve noticed your car behaving oddly, like shifting rough or slipping gears? These symptoms can often trace back to a misaligned or improperly sealed gasket, which can be sneaky. It’s tempting to dismiss minor drips, but over time, they can escalate into serious issues. In fact, according to expert insights, even a tiny leak from an incorrectly installed gasket can cause the transmission fluid to drop below safe levels, risking engine and transmission damage (source: AutoFix Clinic).
So, what exactly should you look for to identify if your transmission pan gasket wasn’t installed correctly? That’s where I’ll guide you next—so you can save money, frustration, and keep your vehicle running smoothly without surprises.
Prepare Your Workspace and Gather Tools
Start by parking your vehicle on a level surface and engaging the parking brake. Gather essential tools: a socket set, a gasket scraper, a clean rag, gasket sealant (if recommended), and a new transmission pan gasket. Wear gloves to keep your hands clean and to prevent any injuries. I once worked on my friend’s truck, and having the right tools prepared prevented a frustrating delay when the gasket tore during removal.
Drain the Transmission Fluid Carefully
Locate the transmission drain plug or pan bolts and drain the fluid into a suitable container. Be cautious, as residual fluid can spill. Properly dispose of used transmission fluid at a recycling center. I remember meticulously draining the fluid before removing the pan, which kept my garage floor clean and avoided contamination. This step ensures you won’t make a mess during gasket replacement and helps you gauge fluid loss.
Remove the Transmission Pan and Old Gasket
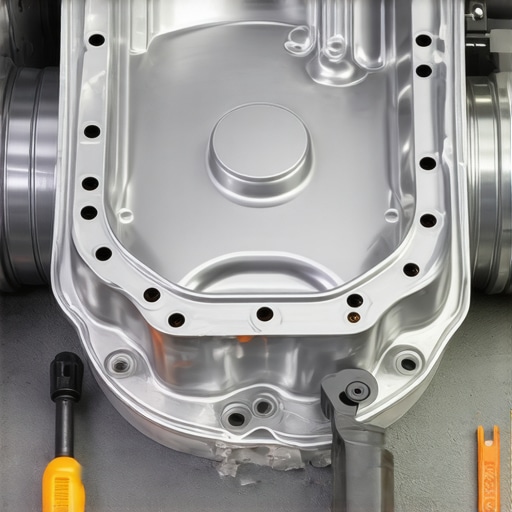
Loosen the bolts holding the transmission pan in a crisscross pattern to prevent warping the metal. Carefully lower the pan and inspect the gasket for tears or deformation. Use a gasket scraper to remove leftover gasket material from the transmission surface, ensuring the mating surface is clean and smooth. Think of it like scraping off dried glue before sticking a new sticker—any residue can cause leaks. During my last repair, neglecting this step caused a persistent leak, leading me to reseal the entire pan.
Inspect and Prepare the Surface
Examine the transmission mating surface for scratches or warping. If necessary, smooth out minor imperfections with fine-grit sandpaper. Clean the surface thoroughly with a lint-free rag and solvent to remove oil, dirt, or old gasket remnants. Proper surface prep is critical; even a tiny debris or blemish can compromise the seal, similar to how a tiny pebble ruins a perfect paint job. Neglecting this can cause gasket failure down the line, which I’ve experienced firsthand during a rushed job.
Apply Gasket Sealant and Place the New Gasket
If your gasket manufacturer’s instructions specify, apply a thin layer of gasket sealant around the mating surface or gasket periphery. Position the new gasket carefully, aligning bolt holes exactly. Avoid stretching or twisting the gasket; it’s like assembling a puzzle—precision results in better sealing. When I replaced my gasket, I patiently aligned each bolt hole, which prevented leaks and saved me from following up with additional repairs.
Reinstall the Transmission Pan and Bolts
Hand-tighten the bolts in a crisscross sequence to evenly seat the gasket and avoid flexing the pan. Then, torque each bolt to the manufacturer’s specifications, usually in small increments. This step ensures uniform pressure on the gasket, much like tightening lug nuts on a wheel for a balanced ride. I remember using a torque wrench to achieve the correct tightness, which kept the gasket sealed properly and prevented future leaks.
Refill Transmission Fluid and Check for Leaks
Replace the transmission fluid according to your vehicle’s specifications, using a quality recommended by ASE standards. Start the engine and let it idle, shifting through all gears to circulate fluid. Observe the pan area for leaks. If any seepage appears, tighten bolts slightly, but do not over-torque. During my last fix, I checked underneath after a short drive and was relieved to find no leaks—saving me hours of troubleshooting later. This confirmation ensures your gasket installation was successful and your transmission remains sealed tight.
Many car owners believe that an ASE certification alone guarantees top-quality service, but in my experience, this can be a misleading assumption. The truth is, ASE certification signifies a technician’s baseline competence, yet it doesn’t automatically translate to superior diagnostics or craftsmanship. For example, a mechanic might be ASE-certified but still lack the practical experience needed to identify nuanced issues like a subtle transmission slipping pattern that only manifests under specific conditions, such as after a fluid change. Relying solely on a badge can lead to complacency, increasing the risk of missing critical signs that are often overlooked—like a faint, almost imperceptible leak indicating deeper problems.
A common myth is that all oil changes are the same, but advanced mistakes often stem from overlooking the importance of oil quality and proper filter selection. Cheap, universal filters or incorrect oil types can accelerate engine wear or cause oil starvation, especially in modern turbocharged engines that demand precise lubrication. Many assume that a quick oil replacement is a routine task, yet failing to follow manufacturers’ specifications for oil viscosity and change intervals—particularly in extreme climates—can drastically reduce engine lifespan. Regular oil changes are more nuanced than just ticking a box.
Another advanced mistake involves the misunderstanding of transmission service nuances. Many think that a simple transmission flush suffices to maintain gearbox health. However, if performed improperly or too frequently, it can dislodge debris and cause more harm than good. Additionally, neglecting to use manufacturer-approved fluids and worrying only about service cost rather than quality can lead to costly transmission failures down the line. An important tip is to remember that transmission maintenance requires a tailored approach, especially for high-mileage vehicles.
Be cautious of the trap where car owners misunderstand the scope of ASE certifications. While they indicate a certain standard, they do not reflect the technician’s real-world experience with specific makes or models. As I’ve learned, some shops boast multiple ASE-certified technicians but may lack specialized knowledge for European or hybrid vehicles. This gap can lead to misdiagnosis, such as mistaking a failing alternator for a dead battery, or misinterpreting subtle sensor issues that cause driveability problems. Checking a mechanic’s actual experience in your vehicle’s make and model can save time and money.
One advanced question often overlooked is: What are the pitfalls of assuming all car diagnostics are straightforward? Modern vehicles are equipped with complex electronic systems that communicate through CAN bus networks, making simple codes sometimes misleading. For example, a diagnostic trouble code might point to a sensor malfunction, but the root cause could be an underlying wiring issue or ECU malfunction. Jumping to replacement without thorough testing can be a costly mistake. A professional approach involves using comprehensive diagnostic scanners and understanding the intricacies of vehicle electronics, as highlighted in expert guides. Diagnosing false codes is an advanced skill that separates good shops from average ones.
Remember, the devil is in the details when it comes to car maintenance. Misconceptions can lead you to overlook crucial signs, adopt improper procedures, or trust labels over expertise. Having this awareness helps you become an informed owner, capable of requesting the right services and understanding the nuance involved. Have you ever fallen into this trap? Let me know in the comments and share your experiences to help others navigate the complexities of vehicle care.Maintaining a vehicle over time requires more than basic knowledge; it demands the right tools, a disciplined approach, and an understanding of evolving technology. As someone passionate about vehicle care, I’ve found that investing in specific, high-quality equipment pays dividends in reliability and peace of mind. Starting with a reliable digital inspection camera, like the Wi-Fi-enabled endoscope, has revolutionized the way I diagnose issues without invasive procedures. This tool allows me to peer into tight spaces, such as beneath the transmission or within engine compartments, revealing leaks or wear before they escalate. Additionally, a professional-grade multimeter with temperature and frequency readings helps me verify electrical components and sensor signals precisely, ensuring that repairs address root causes, not just symptoms.
How do I maintain transmission health over time?
Regularly checking the transmission fluid level and condition through a quality scan tool keeps me ahead of potential issues. I prefer using ASE-recommended diagnostics software that provides detailed real-time data, helping me spot irregularities like slipping or overheating early. For oil changes, sticking to tools like a fluid extraction pump simplifies the process, avoiding messy spills and ensuring the correct volume is replaced according to manufacturer specs, which many modern vehicles demand. I also rely on a torque wrench calibrated to OEM specifications to tighten bolts evenly, preventing gasket leaks, especially around the transmission pan.
Long-term results come from consistency and implementing a preventive maintenance schedule. For example, setting reminders via maintenance software tailored to my vehicle’s make and model ensures timely servicing. Plus, I keep a log of every repair, utilizing apps like Car Scanner or OBDLink to track sensor readings and error codes over time. This proactive approach often catches subtle anomalies that could lead to costly repairs if ignored.
Scaling your maintenance routine sounds daunting—what’s the best way to do it?
Embracing diagnostic and repair tools that are scalable is key. Investing in a comprehensive OBD-II scanner that supports Wi-Fi connectivity and cloud-based data storage makes it easy to manage multiple vehicles, whether for personal use or a fleet. As technology advances, I predict a future where AI-driven diagnostics will provide predictive maintenance alerts, telling you exactly when a part is likely to fail based on operational data—saving money and reducing downtime.
If you’re ready to take your vehicle maintenance to the next level, try incorporating a professional-grade diagnostic tool combined with regular visual inspections using a quality inspection camera. These small investments can deliver significant long-term benefits, keeping your vehicle reliable and performance-optimal for years to come. For personalized advice on the best tools for your vehicle, don’t hesitate to reach out.

What I Wish I Knew About Precise Gasket Installation Early On
My biggest realization was that even seemingly minor details, like ensuring the gasket’s perfect alignment, can dramatically affect transmission health. Rushing the task or skipping a thorough surface prep might save time initially but leads to costly repairs later, emphasizing the importance of patience and attention to detail in car service.
I learned that trusting the installation process means following the manufacturer’s torque specifications meticulously, not just tightening bolts by feel. This lesson transformed my approach from guesswork to precision, reducing leaks and ensuring longevity for my vehicle’s transmission.
One profound insight was that surface cleanliness isn’t just about aesthetics—it’s about sealing effectiveness. Removing old gasket remnants and debris can mean the difference between a lasting seal and future leaks, highlighting the critical nature of preparation in any ASE-certified repair.
My Go-To Tools and Resources for Reliable Transmission Work
- Torque Wrench: Essential for applying the correct bolt tightness, preventing gasket deformation and leaks. I trust my calibrated wrench for every transmission service.
- Gasket Scraper: Quality tools like plastic scrapers prevent surface damage during gasket removal, ensuring a smooth surface for a perfect seal.
- High-Quality Replacement Gaskets: I choose OEM or proven brands that meet ASE standards, giving me confidence in their durability and fit.
- Technical Manuals and Manufacturer Guides: Connecting with reliable online resources and OEM documentation ensures I adhere to best practices tailored to each vehicle model.
Keep Your Car Running Smoothly and Feel Confident
Taking control of transmission gasket care isn’t just about fixing leaks; it’s about empowering yourself to maintain your vehicle’s reliability. Small steps, like proper surface prep and tool quality, create big differences over time. Remember, genuine car care involves continuous learning and applying best practices, making your ownership experience more enjoyable and less stressful.
Have you ever overlooked a seemingly minor step that led to larger issues down the line? Share your story below and let’s learn from each other’s experiences with ASE certified, transmission, oil change, and car service challenges.