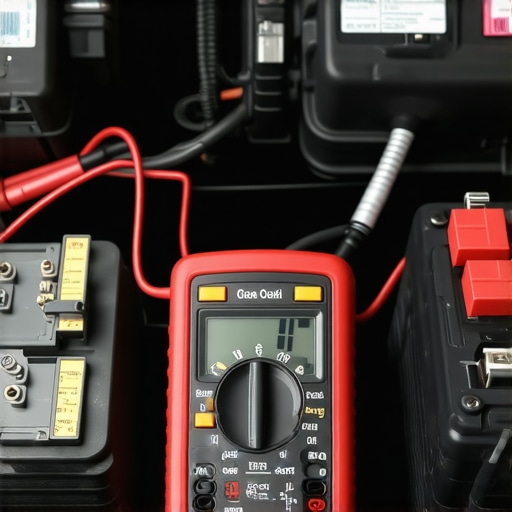
How to spot a failing alternator with a simple multimeter
It was a chilly Tuesday morning when I turned the key, expecting my usual reliable start. Instead, I was met with a sluggish turn of the engine, accompanied by that faint, unsettling flicker of the dashboard lights. My heart sank — could my alternator be giving out? That moment, raw and immediate, was my lightbulb moment. Like many car owners, I hadn’t realized how crucial the health of my alternator truly was until it started to fail, leaving me stranded at the worst possible time.
Later, I learned that a failing alternator is one of those sneaky problems that sneak up on you. It doesn’t usually happen overnight, but rather, it gives warning signs — dimming headlights, slow engine cranking, or erratic dashboard indicators. The thought of a costly repair or being stranded miles from help is enough to make anyone nervous.
But here’s the good news: you don’t need to be an ASE-certified mechanic to diagnose an alternator’s health. With just a simple multimeter and a little know-how, you can catch potential issues early. That’s exactly what I want to share today — how to identify a failing alternator using a multimeter, based on my own experience and some solid advice from vehicle maintenance experts.
Why should you care now? Because your car’s electrical system is vital to safety and reliability. An alternator’s job is to keep your battery charged and power your electrical accessories. If it fails, your car can suddenly lose power, leaving you stuck or even causing damage to your vehicle’s sensitive electronics.
So, if you’ve ever faced a mysterious dead battery or a flickering dashboard, this guide is for you. We’ll walk through how to test your alternator with just a multimeter, a tool you probably already have lying around or can easily pick up.
And, let me be honest — I made the mistake early on of assuming that a new battery fixed everything. Turns out, neglecting the alternator could have left me stranded again. That mistake taught me the importance of proper diagnosis before jumping to conclusions. Trust me, avoiding unnecessary replacements has saved me time and money, and it can do the same for you.
Ready to get started? Before we dive into the step-by-step testing process, it’s good to understand why recognizing the signs early on can prevent costly repairs. Plus, I’ll share some tips on what to look out for that might be warning signals, even before your multimeter comes into play.
Gather Your Tools and Prepare Safely
Start by parking your car on a flat surface, turning off the engine, and engaging the parking brake. Gather a quality digital multimeter—if you don’t have one, you can contact us to get it checked or replaced. Wear gloves to protect yourself and avoid accidental shocks. Remember, safety first!
Locate Your Alternator and Battery
Find the alternator, usually on the front or side of the engine, driven by the serpentine belt. The battery is typically in the engine bay on the driver’s side. Knowing their locations helps streamline the testing process—think of it as setting your map before a road trip.
Test the Battery Voltage
Set your multimeter to 20V DC range. Connect the red (positive) lead to the positive terminal of the battery and the black (negative) lead to the negative terminal. A healthy, fully charged battery should read approximately 12.6 volts or higher. During my first try, I missed connecting properly and got a false low reading—double-check your connections like you would double knot shoelaces.
Start the Engine and Measure Voltage
With the engine running, repeat the voltage test at the battery terminals. The voltage should now read between 13.8 to 14.4 volts, indicating the alternator is charging. If the voltage remains at or below the battery’s rest voltage, your alternator might be weak or failing. Once, I found my voltage was only 12.5V, which prompted me to proceed with further testing—it’s better to be thorough than to risk getting stranded.
Perform the Alternator Output Test
While the engine runs, place the multimeter’s positive lead on the alternator’s output terminal (not the battery terminal). Touch the negative lead to the alternator’s ground point. The reading should match the battery voltage range (13.8–14.4V). A significantly lower reading indicates poor alternator output, similar to a low water level in a pump—it’s running but not supplying enough.
Check for Fluctuations and Drifting
Watch the multimeter for fluctuations. Stable readings are normal; erratic numbers suggest wiring issues or a failing alternator. When I experienced sudden dips, I realized my alternator’s diode bridge was damaged—demonstrating why continuous observation matters.
Additional Checks for Experts
If you’re comfortable, test the voltage at the alternator’s rear terminal while the engine is running. Many alternators have a small connector with a warning light or sensing wire—you can check for voltage there too, which provides insight into the control circuitry.
Note on Professional Verification and Maintenance
While these steps are straightforward, consulting a professional can save you time. Proper diagnosis often involves multiple tests and tools beyond a multimeter. Need expert assistance? Contact us today. Regular checks prevent unexpected breakdowns and keep your electrical system healthy, just like regular oil changes support your engine’s longevity (see why).
Few car owners realize that misconceptions about essential maintenance practices often lead to costly repairs down the line. For instance, many believe that changing oil only matters when the car’s engine starts showing signs of trouble, but in reality, neglecting regular oil changes can accelerate wear and damage vital components. An expert’s view emphasizes that timely oil changes are crucial for engine longevity, yet the myth persists that synthetic oils last forever—or at least longer than they actually do, which can be misleading.
Are All Car Maintenance Checks Necessary or Overkill?
Some drivers think that routine service visits are just upselling tactics, but skipping these inspections can hide serious issues like transmission troubles or brake wear. Interestingly, inexperienced DIYers often overlook that not all oil changes are created equal; using the wrong type or neglecting to replace filters can cause engine sludge and reduced performance. For example, a common mistake is ignoring the small but vital oil filter during service, which can lead to contaminated oil circulating through your engine. Over time, these oversights culminate in premature component failure. Even professional technicians sometimes fall prey to misdiagnosis, especially if they rely solely on visual cues without comprehensive testing. This is why guidance from ASE-certified experts at trusted shops can make all the difference. Many drivers underestimate the complexity behind transmission systems, assuming that low fluid or shifting problems are just minor inconveniences. However, as detailed in transmission specialist insights, ignoring early symptoms can lead to complete transmission failure, which is far more expensive than preventive maintenance. The nuance often missed is that transmission, oil, and car service all operate within a delicate ecosystem—neglect one, and the others suffer. For example, a neglected oil change can cause overheating in transmission fluid, accelerating wear. To avoid falling into these traps, it’s wise to consult with professionals and adhere to the manufacturer’s recommended service intervals, which can be found in your owner’s manual or via trusted service providers. Don’t forget, regular maintenance isn’t just about avoiding breakdowns; it’s about optimizing your vehicle’s performance and safety every mile you drive. Have you ever fallen into this trap? Let me know in the comments.
Tools That Bring Confidence to Car Maintenance
When it comes to maintaining your vehicle, having the right tools isn’t just convenient — it’s essential. I personally rely on a high-quality digital multimeter, which has become my go-to for diagnosing electrical issues like alternator performance. Unlike cheap models, my multimeter offers precise readings even at lower voltages, allowing me to catch potential problems early. Additionally, a set of metric and standard sockets and wrenches ensures I can handle everything from oil drain plugs to battery terminals without frustration.
One tool I swear by is a dedicated oil filter wrench. Using the correct size prevents damaging the filter or surrounding components. It might seem minor, but inspecting and replacing filters correctly can prolong your engine’s health and save money. For monitoring the health of transmission fluid and other vital liquids, a refractometer offers quick, accurate readings, providing insights into whether your fluids are still doing their job effectively.
Software and Methods for Ongoing Monitoring
Technology has advanced beyond manual checks. I utilize basic onboard diagnostics (OBD-II) scanners that are compatible with smartphone apps. These devices allow me to read live sensor data, check for stored trouble codes, and monitor system performance without visiting a mechanic. Investing in a reputable model, such as those certified with the ASE certification, ensures reliability. Regularly scanning your vehicle can reveal emerging issues before they become costly repairs.
Moreover, I recommend employing a good borescope. This flexible camera helps inspect hard-to-reach areas like the interior of your transmission bell housing or inside engine cylinders. It’s invaluable for diagnosing complex problems without expensive disassembly. With the right tools, you gain not only peace of mind but also a perspective that professional technicians often possess — an advantage I believe is worth cultivating.
Future Trends: Towards Smarter Maintenance
Looking ahead, I predict that integration of AI-driven diagnostics and telematics will become standard in personal vehicle maintenance. These systems will alert you on your smartphone about potential failures based on data analytics, making proactive care easier than ever. Already, some advanced cars can predict transmission issues months before symptoms appear, saving drivers thousands in repairs.
How do I keep my vehicle running smoothly over time?
Maintaining reliability requires consistent checks, proper fluid management, and using recommended parts. For example, following top oil change tips ensures engine health, while regular transmission diagnostics can prevent shifting problems. My advice? Commit to scheduled services, use certified ASE technicians when needed, and leverage modern diagnostic tools to stay ahead of trouble. Trying out a multimeter for periodic electrical checks can reveal issues before the dashboard alerts you — an advanced step worth the effort. Remember, proactive maintenance today keeps costly repairs at bay tomorrow.
Lessons That Changed My Approach to Car Care
One of the most valuable insights I gained was realizing that relying solely on the battery’s age or appearance can lead to overlooking the true culprit behind electrical issues. I once replaced my battery prematurely, only to face the same problems again, which taught me to dig deeper into the alternator’s role. Recognizing the subtle signs—like dimming lights or slow startups—early on made all the difference, saving me from costly repairs and unexpected breakdowns.
Another lesson was understanding that a multimeter isn’t just a diagnostic tool but a gateway to fostering confidence in DIY maintenance. When I first learned how to read voltage fluctuations at the alternator and battery, I felt empowered, knowing I could catch problems before they became emergencies. It’s a simple skill but transformative in how I approach vehicle upkeep.
Lastly, I discovered that regular checks—be it with a multimeter or a visual inspection—are investments in peace of mind. Waiting for dashboard warning lights can be risky; proactive diagnosis is often quick, affordable, and can prevent sleepless nights stranded on the roadside. This mindset shift from reactive to proactive maintenance has been one of the best decisions I’ve made.
Tools and Resources That Make a Difference
My essential toolkit for diagnosing alternator health includes a high-quality digital multimeter, which I trust for its accuracy and ease of use. I also use a reliable OBD-II scanner compatible with smartphone apps, like those certified with the ASE standards, to monitor system health and catch issues early. For inspecting hard-to-reach components, a flexible borescope has been invaluable, allowing me to see inside engine compartments without costly disassembly.
Beyond physical tools, I turn to educational resources such as comprehensive guides on oil changes and vehicle maintenance that deepen my understanding. Regularly consulting trusted sources ensures I stay updated on best practices and emerging technologies, making my DIY efforts more effective and less risky.
Fuel Your Drive for Better Car Care
Your journey towards confident vehicle maintenance starts today. Mastering simple diagnostics like multimeter tests for your alternator can save money and reduce stress, turning you from a helpless fixer into a proactive protector of your car’s health. Remember, every checkup is a step toward smoother rides and longer vehicle life. You’ve got this—take charge of your car maintenance routine and experience the difference.
What has been your biggest Aha moment in maintaining your vehicle? Drop your stories below — I’d love to hear how you’ve learned to keep your car running happily on your own.