What to Do When Your Oil Filter Gets Stuck on the Housing
It happened to me just last month during a routine engine oil change—I was twisting that oil filter with all my strength, and suddenly, it wouldn’t budge. Not only did I feel that surge of frustration, but I also realized I was inches away from stripping the filter or damaging the housing. We’ve all been there—trying to avoid an expensive trip to the mechanic, only to be stopped short by a stubborn oil filter. That light, clinging tightly like a stubborn barnacle, can turn what should be a simple task into a stressful, time-consuming ordeal.
Why You Shouldn’t Ignore a Stuck Oil Filter
A stuck oil filter isn’t just a minor annoyance. If it refuses to loosen, it can lead to potential engine damage, messy leaks, or even stripping the threads in your filter housing. These issues can escalate quickly, turning a straightforward oil change into a costly repair. Early on, I made the mistake of forcing it too hard—thinking I needed more muscle—only to realize I was risking more damage. Proper techniques and tools are crucial, and trusting a professional can save you time and money. For insights on how regular maintenance extends your car’s lifespan, check out this guide.
Is Trying to Force It Worth the Risk?
Many beginners worry that using extra force might cause cracks or damage, but applying the wrong technique can be worse. Early mistakes often include using the wrong tools or applying too much torque, which can strip threads or crack the housing. I learned this the hard way. The key is to approach the task with patience, leverage the right tools, and sometimes, take a break to reassess rather than brute-force your way through. Having proper guidance makes all the difference—expert advice can be your best friend here. Curious about how ASE certification impacts your car maintenance? Visit this article.
Ready to tackle that stubborn oil filter and keep your engine healthy? Let’s walk through the practical methods that will make this task easier and less stressful than ever before.
Gather the Right Tools Before You Start
Having the proper tools makes all the difference. Use a high-quality oil filter wrench that fits your filter size—think of it as using the right socket for a bolt. I remember one attempt where I grabbed a generic wrench; it slipped, and I damaged the filter housing. For best results, opt for a ratchet-style wrench and a pair of channel-lock pliers as backups. Also, keep a clean rag, penetrating oil like WD-40, and a drain pan handy to catch old oil. This preparation ensures a smoother process and minimizes frustration.
Apply Penetrating Oil to the Seal
Start by locating the oil filter and spraying a liberal amount of penetrating oil around the seal and threads. Let it sit for about 10-15 minutes. Think of it like loosening a rusty bolt—giving the oil time to seep in breaks the bond. I once ignored this step, forcing the filter, which led to a crack in the housing. Patience here prevents unnecessary damage. If your filter hasn’t been replaced in a while, this step is especially crucial. For more tips on maintaining your vehicle, consider checking this guide.
Use Steady and Controlled Force
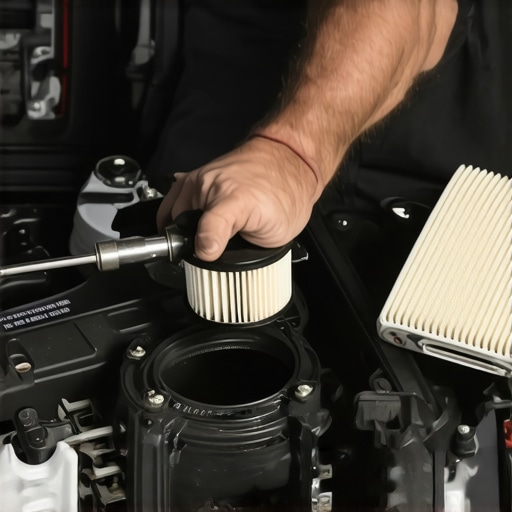
Clamp the wrench firmly onto the filter and turn counter-clockwise. Apply steady pressure—imagine opening a stubborn jar lid—you want gradual movement. If resistance persists, stop and try again later. Too much force can strip the threads or crack the filter housing, leading to costly repairs. A micro-story: I once used a pipe wrench, turning with all my might, which resulted in a damaged housing. Instead, I switched to a strap wrench, which provided better control and prevented damage. Remember, patience is key to avoiding unnecessary complications.
Leverage Heat for Extra Help
If the filter still refuses to budge, carefully warm the engine for 5-10 minutes—warmth makes metal components expand slightly, loosening their grip. Be cautious not to overheat, as excessive heat can damage rubber seals. I once carefully started my engine, then turned it off and waited, which helped loosen a stubborn filter on a cold winter day. Always avoid using any open flames or external heat sources. This step can be a game-changer when facing a truly stuck filter.
Utilize a Strap Wrench or Specialized Tool
If standard tools fail, switch to a strap wrench or a specialized oil filter removal tool. These tools distribute force evenly and reduce the risk of damage. Think of it like using a torque wrench instead of a wrench and a hammer—precision prevents accidents. I recommend testing the tool on a small unscrewing task beforehand. When handled properly, these tools save time and prevent frustration, making the process much more manageable.
Turn in Small Increments and Reassess
When applying force, turn the wrench in small, consistent increments—about a quarter turn at a time—and then pause to check progress. This cautious approach prevents slipping or sudden movement. Sometimes stopping to reassess allows the penetrating oil to work better or to determine if the filter is moving at all. Once loosened, remove the filter by hand to avoid dropping debris into the engine bay.
Precautions When Replacing a Stuck Filter
Before installing a new filter, ensure the mounting surface is clean and free of old gasket material. Lubricate the gasket of the new filter with a bit of new oil to ensure a proper seal. Tighten the new filter snugly—hand-tight plus a quarter turn—avoiding overtightening, which can make future removal difficult. For a comprehensive understanding, explore this detailed advice. Taking these precautions ensures your next oil change remains smooth and hassle-free.Many car owners assume that an ASE certification guarantees flawless service, but in reality, it’s just one piece of the puzzle. **The common myth** is that ASE-certified mechanics always perform perfect work, yet studies reveal that even certified technicians can overlook critical nuances, especially in specialized areas like transmission repair or complex oil system servicing.
Furthermore, a frequent mistake is believing that all car services are interchangeable. The truth is, not every mechanic understands the subtle differences between high-mileage oils, synthetic blends, or the specific needs of modern transmissions. Rushing into a simple oil change without considering these factors might seem harmless but can accelerate wear and reduce your vehicle’s lifespan. To understand why routine maintenance like oil changes is vital, check out this guide.
### Why does a certified mechanic sometimes miss the hidden issues?
Most owners overlook that ASE certification emphasizes technical knowledge but doesn’t necessarily account for experience in every niche — like diagnosing subtle transmission slippage or recognizing early signs of fluid degradation. An expert driving a high-mileage vehicle might detect a minor slip that a less experienced technician could overlook. This is especially relevant given that recent advancements in vehicle technology complicate diagnostics. For example, modern transmissions rely on complex sensors; misinterpreting data from these sensors can lead to misdiagnosis, as highlighted in this article. Don’t just rely on certifications; look for technicians with specific experience relevant to your vehicle.
Another common mistake is underestimating the importance of nuance in transmission and oil systems. For instance, synthetic oils aren’t always suitable for every vehicle—some older models require conventional oils to prevent leaks. Applying the wrong type, even with good intentions, can cause damage. Always ask your mechanic specific questions about the oil type and service procedures. Having a trusted, knowledgeable professional who understands these details can make a significant difference.
### Beware the trap of superficial service
A trap many fall into is considering routine oil changes as a quick, easy task, neglecting deeper system checks. I’ve seen cases where a simple oil change overlooked transmission fluid condition or overlooked signs of potential leaks. Not recognizing early warning signs—like a slight delay in shifting or faint burning smell—can escalate into costly repairs. Regular, nuanced inspections can prevent these mishaps, as detailed in this guide.
In conclusion, a true expert understands that car maintenance isn’t just about certifications or basic procedures; it’s about recognizing the tiny, often hidden nuances that keep your vehicle running smoothly. By asking the right questions and seeking technicians with specialized experience, you can avoid costly pitfalls and extend your car’s life. Have you ever fallen into this trap? Let me know in the comments.Maintaining your vehicle’s optimal performance over the long term requires more than just basic knowledge; it demands the right tools, consistent techniques, and an understanding of future trends. Investing in quality equipment tailored to specific tasks not only ensures safety but also prolongs the lifespan of vital components such as transmissions and engines. For example, a high-grade torque wrench like the TEKTON 1/2 Inch Drive Click Torque Wrench provides precise control during reassembly, preventing overtightening and potential damage—something I personally swear by after experiencing stripped threads from generic tools. Additionally, advanced diagnostic software like Bosch’s FlexiCAN Scanner allows for accurate reading of transmission codes, streamlining troubleshooting and reducing unnecessary repairs.
Incorporating these tools into your routine makes complex tasks, such as transmission fluid replacements or diagnosing subtle shifts, manageable even for hobbyists. Moreover, regular maintenance, like oil changes, should be approached with a strategic mindset. Using high-quality synthetic oils compatible with your vehicle ensures consistent lubrication and performance, especially as vehicles evolve with sophisticated systems. As technologies advance, predictive maintenance tools—such as OBD-II monitors integrated with smartphone apps—will become standard, giving us real-time insights into potential issues before they escalate.
How do I maintain transmission health over time? Regularly check fluid levels—using a trusted dipstick or electronic sensor—and change fluids at manufacturer-recommended intervals, typically every 30,000 to 60,000 miles, depending on driving conditions. Using a dedicated transmission fluid pump, like the Mityvac VacPump, makes fluid replacement cleaner and more efficient. For ongoing service quality, I recommend subscribing to professional diagnostic platforms and staying informed about updates via manufacturer bulletins. This proactive approach can preempt costly repairs and keep your vehicle running smoothly.
Looking ahead, I believe the integration of AI-driven diagnostic tools will revolutionize maintenance, offering predictive insights tailored to individual driving habits. Embracing these innovations now helps you stay ahead of potential failures and extend your car’s lifespan. Want to take your maintenance game to the next level? Try using a high-precision torque wrench combined with advanced diagnostic software during your next oil change or transmission check—these practices have personally saved me from unnecessary expenses and downtime. For comprehensive guides, visit this resource.
Lessons That Changed How I Approach Car Maintenance
- One of the hardest lessons I learned was that rushing a routine oil change can lead to overlooking transmission health. Focusing only on the basics without understanding how these systems interact can cost more down the road. Taking the time to educate myself on the nuances of ASE-certified services prevented unnecessary repairs and kept my vehicle running smoothly.
- Another realization was that relying solely on certifications doesn’t guarantee perfect work. Genuine expertise comes from hands-on experience and a willingness to dig deeper when problems arise. I discovered that asking detailed questions about the specific procedures and tools used helps ensure I get the best care for my car.
- Furthermore, I underestimated the power of proactive measures like proper tool selection. Using the right torque wrench or diagnostic scanner transforms a frustrating job into a manageable task. Investing in quality tools has made the difference between a hassle and a success in maintaining my vehicle’s transmission and oil system.
Tools and Resources That Made a Difference
- TEKTON 1/2 Inch Drive Click Torque Wrench: Precise control during reassembly prevents overtightening, safeguarding expensive components.
- Bosch FlexiCAN Scanner: This diagnostic tool helps me understand subtle engine or transmission errors before they become costly repairs, saving time and money.
- AutoFixClinic’s Maintenance Guides: Their comprehensive articles, like this guide, offer insights that empower me to make informed decisions and recognize when professional help is needed.
Your Next Step Toward Confident Car Care
Handling ASE certified oil changes and transmission services might seem daunting at first, but with patience and the right tools, you can take control of your vehicle’s health. Remember, every successful DIY attempt enhances your understanding and keeps your car performing at its best each mile. Don’t hesitate to start incorporating these lessons today—your car will thank you for it. Have you ever struggled with a transmission issue or a stubborn oil filter? Share your experiences below so we can learn from each other.
,