The mistake of ignoring a tiny chip in your windshield
It was just a small crack, barely noticeable when I first saw it—a tiny chip in my windshield. I brushed it off, thinking it was no big deal; after all, it’s so minor, right? But as days went by, that little imperfection grew, spreading like wildfire across the glass, making me wonder how I overlooked it for so long. That moment of neglect taught me a harsh lesson about how a seemingly insignificant chip can turn into a costly nightmare if left unattended.
Why Ignoring a Tiny Windshield Chip Can Cost You Big
When it comes to your vehicle’s safety and longevity, paying attention to small issues isn’t just a good idea—it’s essential. A tiny crack or chip might seem harmless, but it’s actually a weak point in your windshield. Over time, exposure to temperature changes, vibrations from driving, and even minor bumps can cause that tiny flaw to expand, potentially leading to full-blown windshield failure. Not to mention, most states have strict regulations regarding windshield damage; driving with a chip can result in fines or failed inspections.
Ignoring this minor damage can also compromise the structural integrity of your vehicle. Your windshield isn’t just a glass panel; it’s a key component of your car’s safety system, providing additional support during accidents. If the windshield fails, the entire safety cage of your vehicle is at risk. Plus, a cracked windshield can distract you while driving, increasing the likelihood of an accident.
According to safety experts, what starts as a small chip can turn into a large crack within just a few months. A study by the Highway Traffic Safety Administration (NHTSA) indicates that repairing chips early can prevent over 90% of full windshield replacements. That’s a significant difference—not just in safety, but in costs as well.
Have you ever ignored a small crack, thinking it would wait? You’re not alone, but my experience proved otherwise. The mistake I made early on was believing I could delay repairs. Instead, I ended up needing to replace my entire windshield, which was far more expensive and time-consuming. Don’t make the same mistake.
Next, I’ll walk you through how to recognize the signs that your windshield chip needs immediate attention and guide you on the best steps to take before that tiny flaw turns into a big problem.
Assess the Damage Immediately After Spotting the Chip
The first action I took when noticing a tiny chip was to inspect it thoroughly. Remove any debris around the crack with a soft cloth and examine if the chip has expanded or deepened. This step is crucial because small surface damages can often be repaired if caught early. Remember, a shallow chip is much easier and cheaper to fix than a large crack.
Gather the Necessary Tools and Materials
Equip yourself with a windshield repair kit, which typically includes resin, applicator, curing film, and a razor blade. Opt for a kit that meets industry standards—this ensures a quality repair. When I attempted my first repair, I chose a high-quality kit recommended by professionals, reducing the risk of ineffective fixes. Proper tools are vital since subpar materials can cause the repair to fail, leading to more costly replacements.
Prepare Your Vehicle and Environment for Repair
Park your car in a shaded, dust-free area and turn on the defroster to prevent moisture buildup during the process. Clean the windshield surface with a glass cleaner, avoiding any abrasive substances that can smear or etch the glass. I learned this the hard way when cleaning with household soap, which left residues that hindered adhesion. Preparing the environment ensures the resin adheres properly, resulting in a durable fix.
Apply the Resin Correctly—Precision Matters
Follow the kit’s instructions carefully. Typically, you’ll attach the applicator over the chip, inject the resin, and apply pressure to force it into the crack. During my first attempt, I struggled with air bubbles and excess resin, but I found that gentle, steady pressure and patience yielded better results. Excess resin can create unsightly bubbles, so use the provided razor blade to remove any surplus after curing.
Cure the Repair and Verify Effectiveness
Expose the resin to sunlight or use a UV light as directed. The curing process solidifies the repair, restoring the glass’s integrity. After curing, inspect the repair area for clarity and bonding. I was surprised to see how seamless my fix was after proper curing, but if the crack remains visible or feels weak, a professional assessment is advised.
Know When to Seek Professional Help
If the chip is larger than a quarter, or if multiple cracks are present, DIY repair might not suffice. In such cases, visiting an auto glass specialist ensures your safety isn’t compromised. I learned this by attempting to repair a slightly larger chip myself, only to find the repair failed after a few weeks, necessitating a full windshield replacement. Professional technicians use advanced techniques and materials that guarantee lasting repairs.
Prevent Future Chips with Smart Driving Habits
Maintaining a safe distance from trucks and other large vehicles prevents debris from hitting your windshield. Regularly check your windshield for tiny chips and address them promptly through a quick visit to your local auto repair shop. Additionally, consider applying a windshield protectant to reduce the impact of minor debris over time.
Schedule Regular Vehicle Maintenance
Beyond windshield care, routine maintenance like oil changes and transmission checks can improve overall safety and prevent costly repairs. For example, wearing out your transmission can lead to unexpected breakdowns that distract you from observing small damages. Learn more about the significance of regular oil changes and how certified experts can help keep your vehicle in top shape.
Many car owners believe they understand the basics of vehicle care, but beneath the surface lie nuances that can make or break your car’s longevity and safety. While common advice like “regular oil changes are enough” or “ASE certification guarantees quality” is widespread, there are critical pitfalls and misconceptions that even seasoned drivers often overlook.
Are All ASE Certifications Equal, or Is There More to Trust?
Contrary to popular belief, not all ASE-certified technicians are equally skilled across all vehicle types. The ASE certification covers a broad range of specialties, but many technicians might specialize in certain areas, leaving gaps in others. For example, a technician certified in transmission repair may not have the same expertise in electronic systems or hybrid engines. To truly ensure comprehensive care, consider visiting specialists with targeted experience, which you can verify by learning more about what ASE certification truly signifies. Relying solely on generic certifications can sometimes lead to oversight of nuanced issues, leading to costly aftermaths.
Misconception about simple oil changes also persists. Many assume that any oil change shop does the same quality work, but as discussed in top oil change tips, the quality of oil, filter, and proper procedure significantly influence engine health. Using cheap oil or neglecting the correct oil filter can accelerate engine wear, especially in modern engines with tighter tolerances. Advanced engines, like turbocharged or GDI (Gasoline Direct Injection) engines, demand not just regular oil changes but specific oil types and changes at precise intervals—details often missed in routine service.
Furthermore, the common myth that all transmission issues stem from fluid levels glosses over more complex realities. Low transmission fluid is a cause, but many transmission failures are due to neglected maintenance like fluid degradation, incorrect service procedures, or internal component wear. Studies show that proactive transmission maintenance, including timely fluid flushing, extends the life of your transmission far more effectively than just topping off fluid levels. Professionals often warn about the pitfalls of “drain and fill” procedures done too infrequently or improperly, which can cause more harm than good. For insights on ensuring smooth shifting, check out expert transmission tips.
Let’s also clarify a common mistake: ignoring subtle signs that indicate deeper issues. Strange noises, hesitation, or vibrations are often dismissed as minor, but they can be early warnings of critical failures. Advanced diagnostics, including live-drive data, can catch these issues before they escalate, saving you money and safety hazards.
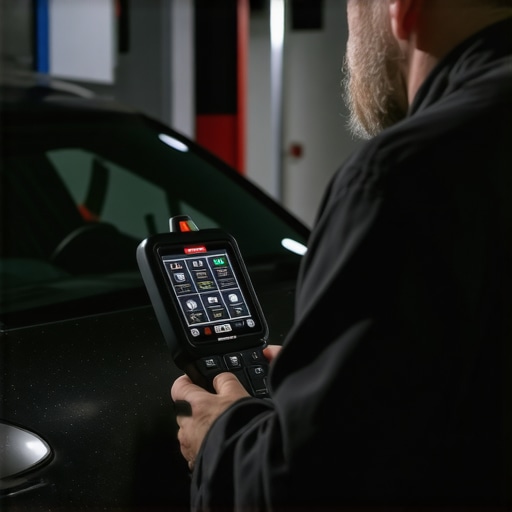
In my experience, a holistic approach—trusting specialists when necessary, following detailed maintenance schedules, and paying attention to subtle signs—yields the best results. Don’t let misconceptions cause your vehicle to become an expensive problem later. Have you ever fallen into this trap? Let me know in the comments and share your experiences.Maintaining your vehicle’s performance over the long term calls for the right tools and an informed approach. As someone deeply involved in car maintenance and certified in ASE standards, I emphasize using specialized equipment designed for precise diagnostics and repairs. One indispensable tool I rely on is a high-quality OBD-II scanner like the BlueDriver, which allows me to access detailed engine codes and real-time data, ensuring I can identify issues before they escalate. For transmission diagnostics, an advanced scan tool such as the Autel MaxiSYS series provides in-depth insights into shifting problems or sensor malfunctions, aligning with procedures outlined in expert transmission maintenance guides.
Alongside hardware, robust software solutions are vital. I recommend investing in professional diagnostic programs like Mitchell1 or Alldata, which integrate manufacturer-specific data, wiring diagrams, and repair histories. These platforms enable efficient troubleshooting, saving you time and money. Additionally, for manual inspections, I keep a set of precision screwdrivers, a torque wrench, and a multimeter from brands like Klein or Fluke, chosen for their durability and accuracy. These tools help me perform tasks ranging from changing oil filters to checking electrical systems confidently.
How do I maintain my tools and ensure their accuracy over time?
Regular calibration and proper storage are crucial. I ensure my diagnostic scanners are updated with the latest firmware and software patches, often provided by the manufacturer, to maintain compatibility with evolving vehicle systems. Cleaning and calibrating multimeters and torque wrenches as per the manufacturer’s instructions prevent measurement errors. This proactive approach aligns with industry standards that emphasize precision, such as those outlined in ASE certification guidelines.
Looking ahead, the trend toward integrated vehicle diagnostics and wireless connectivity suggests that future tools will become increasingly sophisticated and user-friendly. Manufacturers are introducing cloud-based diagnostic platforms that sync with mobile devices, offering instant updates and remote troubleshooting capabilities, making maintenance more accessible for both DIY enthusiasts and professionals.
For ongoing reliability, I recommend scheduling routine checks using your diagnostic tools. For example, periodically scanning your vehicle with a professional-grade OBD-II reader not only helps catch emerging issues but also familiarizes you with your car’s baseline performance metrics. This habit makes diagnosing anomalies quicker and more accurate, ultimately extending the life of your vehicle.
Remember, the precision of your tools directly impacts the effectiveness of your maintenance routines. Ensuring they are calibrated and up-to-date empowers you to act swiftly when warning signs appear. If you’re interested in stepping up your car care game, start by investing in a reliable diagnostic scanner and learn to interpret the readouts — this simple upgrade can save you significant costs down the line. For more insights into professional-grade tools, explore expert advice at what ASE certification really entails.
What I Wish I Knew When Starting Out with Car Maintenance
One of my biggest lightbulb moments was realizing that even small issues like a tiny windshield chip can snowball into major expenses if ignored. I learned that trusting superficial fixes without understanding the root cause often leads to recurring problems. For example, I once dismissed a creaking noise in my suspension, only to discover later that it was a sign of an imminent failure that could have been prevented with early professional diagnosis. Prioritizing preventive measures and understanding my vehicle’s behavior has saved me both money and stress. Diving deep into real-world experiences taught me that patience and patience with proper tools are essential for effective car care—it’s not just about quick fixes but building confidence in my own maintenance routines.