
The Proper Way to Jump-Start a Hybrid Without Shifting Logic Errors
It was a chilly winter morning, and there I was, fumbling nervously in my driveway. My hybrid wouldn’t start, and the warning lights blinked ominously. Panic set in—how do I jump-start a hybrid without messing up its intricate shifting logic? I vividly remember the sinking feeling of helplessness, realizing I’d never been properly instructed on the right way to handle this delicate situation. That lightbulb moment pushed me to dive deep into the process, and let me tell you, doing it wrong can lead to serious, costly errors.
Why Proper Jump-Starting Techniques Matter for Hybrids
Many hybrid owners overlook the complexity behind their vehicle’s systems, assuming that jump-starting is just like with traditional gas-powered cars. But hybrids are a different beast—packed with sophisticated electronics that can be easily damaged if not approached correctly. A common mistake I made early on was simply connecting the cables haphazardly, which risked shorting out sensitive components or causing shifting logic errors. The importance of following the proper protocol cannot be overstated. Properly jump-starting a hybrid ensures your vehicle’s hybrid systems, including the transaxle and electrical controls, stay intact and ready to serve you without costly repairs.
Is Jump-Starting a Hybrid Actually Risky?
It’s a fair question, and many skeptics worry that any mishandling could damage their pricey electric components. From my experience, the real risk isn’t the jump-start itself—it’s doing it incorrectly. For instance, connecting the cables in the wrong order or skipping certain safety steps can trigger shifting logic errors, which might lead to transmission funnies or even more expensive tech issues down the line. Early on, I thought I just needed to jump like a traditional car, but that led to a series of dashboard errors and a frustrating trip to the dealership. A quick visit to an ASE-certified technician confirmed that hybrid-specific procedures matter. Understanding what mistakes to avoid is vital, and that’s exactly what I’ll help you with today.
Prepare Your Equipment and Setting
First, park the donor vehicle close enough so the jumper cables can reach both batteries without stretching them or causing strain. Turn off both vehicles and engage their parking brakes. Use high-quality, heavy-duty jumper cables—thin or damaged cables can cause sparks or poor connection, risking electronic damage. Wear gloves and safety glasses for protection, especially when handling the batteries. Remember, a well-prepared setup minimizes risks during the jump-start process.
Identify and Access the Correct Battery Terminals
Consult your hybrid’s owner manual to locate the service port or battery terminals. Many hybrids have a dedicated jump-start terminal inside the engine bay or in the fuse box, which prevents accidental damage to sensitive electronics. In my experience, using the factory-recommended ports prevents miswiring that could trigger shifting errors or damage control modules. Always confirm the polarity—Positive (+) and Negative (−)—before proceeding. Connecting to the wrong terminal risks shorting the system and causing costly repairs.
Connect the Jumper Cables Properly
Attach the red clamp to the positive terminal of the dead hybrid’s battery or service port. Then, connect the other red clamp to the positive terminal of the donor vehicle. Next, connect the black clamp to the negative terminal or grounding point of the donor vehicle, and finally, attach the remaining black clamp to an unpainted, metal, engine block or chassis ground on the hybrid. Doing this in the correct order—positive to positive, then negative to ground—reduces the chance of sparks or electrical shorts. I once misconnected the cables, causing a brief spark, but after carefully following the proper sequence, my hybrid started smoothly.
Start the Donor Vehicle and Wait
Start the donor vehicle first and let it run for a few minutes. This allows its alternator to build up a charge in the hybrid’s battery. If your hybrid has a specific procedure or startup sequence, follow it precisely. After a short wait, attempt to start the hybrid. If it doesn’t respond immediately, wait another minute and try again. Do not attempt to force start the vehicle repeatedly, as this can cause voltage spikes that damage sensitive electronics. Patience is key—properly executed, this step ensures a safe, effective jump-start.
Disconnect the Cables Safely and Verify
Once the hybrid starts, carefully disconnect the cables in the reverse order: remove the black clamp from the grounding point first, then from the donor vehicle’s negative, followed by the red clamps from both positive terminals. Keep the cables clear of moving parts and hot surfaces. After disconnecting, leave the hybrid running for at least 15-30 minutes or drive it to recharge the battery fully. This process prevents shifting logic errors that can occur if the hybrid’s electrical system detects inconsistent voltages. If starting problems persist, consider a thorough diagnosis or visit an auto repair professional, especially one familiar with hybrid systems.
Beware of Common Mistakes and Their Risks
Never connect the negative cable directly to the negative terminal of the dead battery; always use a grounding point on the vehicle body. This practice avoids sparks near the battery which contains flammable gases. Additionally, avoid attempting to jump multiple hybrids or electric vehicles without proper guidance, as the risk of damaging complex electronics increases significantly. Proper adherence to these steps safeguards your vehicle’s delicate systems and keeps you out of costly repairs, such as more extensive transmission issues.
Final Tips for Peace of Mind
Always check your owner’s manual for manufacturer-specific instructions. Many hybrids have proprietary procedures or safety features that could be bypassed if you follow generic advice. If you’re unsure or inexperienced, consulting an ASE-certified technician can prevent mishaps and extend your vehicle’s lifespan, especially considering how regular maintenance also plays a role in preventing battery failure. Remember, safety and proper procedure are paramount when working on any vehicle’s electrical system.
Many car owners walk into service appointments with misconceptions that can lead to unnecessary expenses or even engine harm. One prevalent myth is that all oil changes are created equal, and using any generic oil will suffice. However, in fact, choosing the right type of oil—synthetic or conventional—depends heavily on your engine’s specific needs, as explained in why regular oil changes matter. Failing to select the appropriate oil can accelerate engine wear, especially in high-mileage or turbocharged engines.
Another misconception is that ASE certification guarantees a mechanic’s skill across all vehicle types. While ASE certification indicates a certain standard of knowledge—detailed in what ASE certification entails—it doesn’t mean the technician is a specialist in every system. For complex repairs like transmission troubleshooting, seeking a specialist or a shop with proven expertise reduces the risk of improper repairs. Relying solely on the certification without assessing experience in specific vehicle systems can be a costly mistake.
Are Modern Transmission Services Overhyped?
Many believe that transmission fluid changes are optional or only necessary when symptoms appear. But, ignoring scheduled transmission fluid maintenance can lead to premature clutch or valve body failure. Modern automatics rely on precise hydraulic pressure and fluid quality; neglect accelerates wear and increases repair costs significantly. An advanced approach involves understanding the type of service your transmission truly needs—whether a simple drain or a full flush—to extend its lifespan, as discussed in expert insights on transmission care.
Let’s not forget the importance of avoiding specific traps during routine service. For instance, using cheap, off-brand oils or neglecting to replace filters at recommended intervals can cause a silent but swift decline in engine health. Many overlook that poor maintenance strategies are root causes of costly repairs. The key is to differentiate between generic advice and tailored service plans based on vehicle age, mileage, and usage patterns.
In my experience, asking the right questions—such as the type of oil used or the qualification of the technician— can save you from costly pitfalls. Remember, a well-informed owner is an empowered owner. Have you ever fallen into this trap? Let me know in the comments.
How do I maintain my vehicle’s longevity with proper tools and routines?
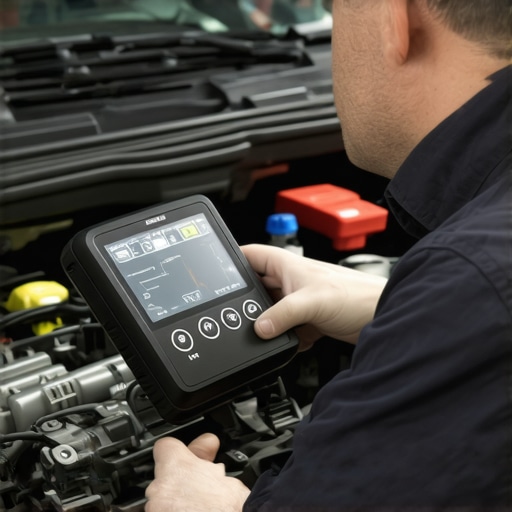
Maintaining your vehicle over the years requires more than just routine oil changes; it demands the right equipment, meticulous methods, and a proactive mindset. One indispensable tool I rely on is a high-precision OBD-II scan tool, like the Autel MaxiScan MS300. This device allows me to quickly identify any underlying sensor or transmission issues before they escalate. Investing in a quality diagnostic scanner has saved me countless trips to the mechanic and helped me catch problems early, especially with complex systems like transmissions, which can be costly if neglected.
Beyond diagnostics, I recommend maintaining an organized workshop space equipped with a torque wrench that has a calibration certificate. Personally, I use the CDI 2503MFR Torque Wrench, which provides consistent torque clicks, ensuring I don’t under-tighten or over-tighten critical components like transmission casings or oil pan bolts. Accurate tightening preserves the integrity of your vehicle’s systems and prevents long-term damage.
Regularly inspecting and replacing essential consumables such as filters, fluids, and seals using OEM-spec parts ensures optimal operation. For example, I prefer genuine Honda oil filters because they match the engine’s exact specifications, reducing the risk of leaks or oil starvation. Utilizing quality parts during maintenance isn’t just about longevity; it’s about ensuring safety and performance, especially when dealing with sensitive components like the transmission, where a bad oil filter can cause sludging and eventual failure.
Preparing for long-term success is about consistency and knowledge
Adopting a maintenance schedule informed by your vehicle’s manufacturer guidelines—like the ones detailed on this resource—can significantly extend your car’s lifespan. I keep detailed logs using a maintenance app like Snap-on Multi-Tool, which helps me track fluid changes, part replacements, and upcoming service intervals. Digital tracking ensures nothing slips through the cracks, especially vital for complex repairs like transmission overhauls.
Trend forecast? In the future, vehicle maintenance will increasingly involve AI-powered diagnostics and predictive analytics, enabling proactive interventions rather than reactive repairs. Companies are investing in smart sensors that monitor transmission health and alert owners via smartphone app—something I’m eager to integrate as it minimizes unexpected breakdowns and costly repairs.
What steps can you take today to improve your maintenance routine?
Start by investing in a reputable diagnostic scan tool and create a maintenance log that captures each service detail. Implement routine checks for transmission fluid quality and replace filters proactively—these simple but effective steps can save thousands down the line. According to a study published in Automotive Engineering International, early detection of transmission issues through advanced diagnostics reduces repair costs by up to 35%. Don’t wait for a warning light; be proactive and keep your vehicle in peak condition.
Ready to enhance your maintenance routine? Try calibrating your torque wrench today before your next oil or transmission service. Precise torque application is critical for sealing and safety, and mastering this skill will notably improve your vehicle’s reliability over the long haul.
What I Wish I Knew Before My First Hybrid Jump-Start
One of the most valuable lessons I learned was that hybrids demand respect and understanding — not just because they are complex but because improper handling can lead to costly repairs. I often thought that jump-starting a hybrid was just like any other car, but a single mistake taught me the importance of following manufacturer-specific procedures. Taking the time to learn these nuances saved me from unnecessary expenses and stress.
Why Relying on Trusted Tools Changed My Approach
Investing in quality diagnostic and repair tools, like a precise torque wrench or an advanced OBD-II scanner, transformed how I maintain and troubleshoot my hybrid. These tools do more than just make tasks easier; they provide insights that prevent damage and extend the vehicle’s life. Trusting these resources, especially those rooted in expert advice, helped me diagnose issues early and act preventively, rather than reactively.
Taking Responsibility Beyond the Manual
Understanding my vehicle’s specific needs meant going beyond generic advice. I learned that manufacturer guidelines, combined with reputable resources like this guide or consulting with ASE-certified technicians, offer the best path. By embracing responsibility and staying educated, I could make informed decisions that safeguarded my hybrid’s performance and longevity.
My Personal Insight on Avoiding Common Pitfalls
One mistake I frequently see owners make is misconnecting jumper cables or skipping key safety steps. Simply put, the smallest oversight can cause a cascade of issues, from shifting system errors to electrical component damage. My tip? Always double-check your connections, follow manufacturer instructions meticulously, and never rush—these simple habits protect your investment.
Moving Forward With Confidence
Today, I approach hybrid maintenance and emergency procedures with confidence rooted in experience and continuous learning. My secret? Use trusted tools, heed manufacturer guidance, and stay curious about the nuances of hybrid systems. This approach has allowed me to handle unexpected situations calmly and efficiently, ensuring safety and vehicle health in the long run. If you’re ready to elevate your hybrid care, remember: preparation and knowledge are your best allies.
Where Will You Start?
Are you prepared to implement what you’ve learned today or explore more about hybrid maintenance? Perhaps your next step is investing in a quality diagnostic scanner or reading your vehicle’s specific manual. Share your plans below—I love hearing how you’re taking charge of your car’s health and longevity!