Stop Using Brake Cleaner on These Sensitive Under-Hood Sensors
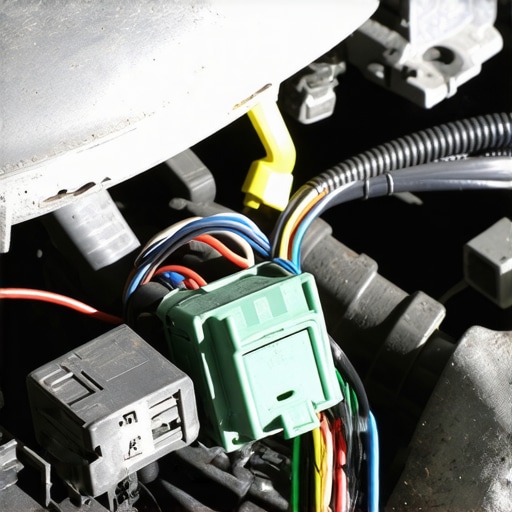
It was a typical Saturday morning in my garage. I was halfway through a routine oil change when I remembered a tip I’d read about cleaning engine bay components. Without thinking twice, I reached for the spray can of brake cleaner and soaked the sensor module sitting just behind the radiator. Moments later, the check engine light flickered on. It was a frustrating, lightbulb moment. I realized I’d just jeopardized a critical sensor that many DIY enthusiasts and even seasoned mechanics sometimes overlook.
Understanding the Real Risks of Brake Cleaner on Sensitive Sensors
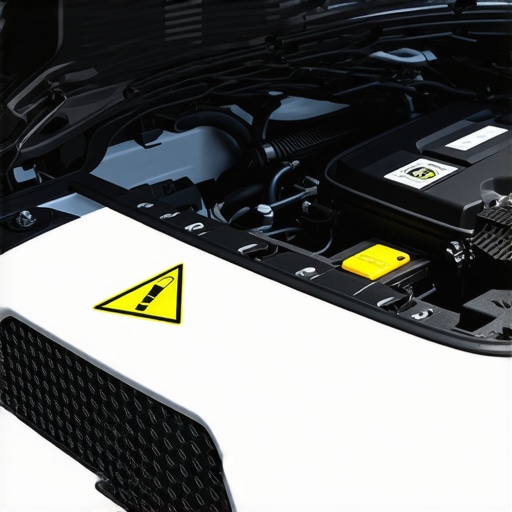
Using brake cleaner might seem like an effective way to cut through grease and grime fast. But when it comes to under-hood sensors—those tiny, delicate components responsible for everything from air-fuel mixture regulation to emission controls—it’s a gamble. These sensors don’t just sit there; they’re finely tuned, with surfaces that can be compromised by harsh chemicals. I learned this the hard way, and I want to share what I discovered so you don’t make the same mistake.
Are you aware that improper cleaning can lead to inaccurate sensor readings, triggering warning lights and potentially causing costly repairs? Early on, I also believed that a quick spray couldn’t hurt, but I soon found out that some contaminants can cause long-term damage, or worse, sensor failure. If you’re thinking about throwing some brake cleaner on your sensors, pause for a moment. Trust me, the risks outweigh the benefits.
According to experts, certain chemicals in brake cleaners are designed to remove brake dust and grease from brake parts, not electronic sensors. In fact, studies show that aggressive solvents can erode the sensitive surfaces of these components, leading to false readings or complete failure. This is especially true for newer sensor designs in models from 2020 onward, which are more susceptible to chemical damage.
If you’re wondering whether this applies to your vehicle—say, your hybrid or turbocharged engine—you’re not alone. Many owners face confusion when their sensors start acting up, and it’s tempting to reach for the nearest cleaning spray. But I urge you to consider the real consequences.
Have you ever experienced misfires or unexplained warning lights after what seemed like a simple cleaning job? If so, you’re not alone. Many drivers discover that quick fixes like chemical sprays lead to costly diagnostics, often involving replacing sensors that could have been saved with proper care.
In the next part of this post, I’ll walk you through safe, effective methods to clean these sensitive components without risking damage. Because safeguarding your vehicle’s vital sensors isn’t just about preventing warning lights—it’s about maintaining optimal performance and saving money in the long run.
Before we dive into the cleaning techniques, let’s explore the most common fears and misconceptions about sensor maintenance, so you’ll know exactly what to avoid.
Prepare the Right Tools and Workspace
Start by gathering non-abrasive electronics-safe cleaner, microfiber cloths, small brushes like paint applicators, and protective gloves. Clear your workspace to prevent dust and debris from contaminating sensitive components. I learned this firsthand when I attempted to clean an intake sensor without proper tools; the dirt I spewed into the connector caused a malfunction that took days to fix.
Identify and Access the Sensor
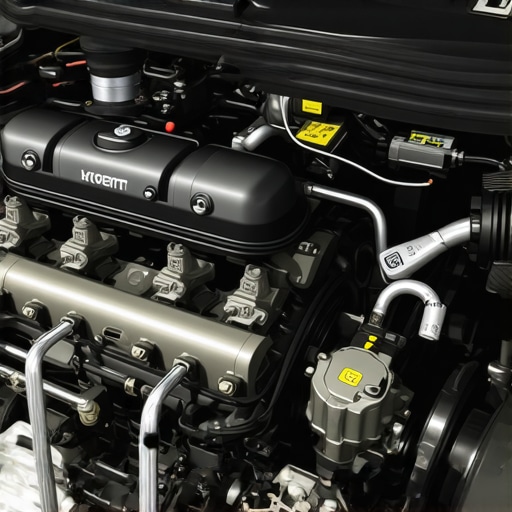
Locate the sensor, typically behind the radiator or near the intake manifold, according to your vehicle’s manual. Use a flashlight and a gentle prying tool if needed. For example, on my Ford, I accessed the MAF sensor behind the air filter housing—necessary not just for airflow regulation but also sensitive to contamination. Keep in mind, forcing or damaging connectors can lead to costly repairs; handle with care.
Disconnect the Sensor Carefully
Disconnect the sensor’s electrical connector by pressing the clip gently but firmly. Don’t yank on the wires. It’s analogous to disconnecting a delicate headphone jack—pulling on the cable can break the connector or wiring. I’ve permanently damaged sensors by applying too much force, resulting in extra expenses.
Clean Using Proper Methods
Use Electronics-Safe Cleaning Solutions
Spray a minimal amount of electronics-compatible cleaner onto the microfiber cloth or applicator. Avoid using aggressive solvents, as these can erode sensor surfaces. I once used brake cleaner—the result was a sensor that flickered and sent false alerts. Instead, opt for a sensor-specific cleaner or Isopropyl alcohol (70%).
Gently Wipe the Sensor Surface
Lightly wipe the sensor’s exposed parts—typically the sensing element and the surface housing. Don’t rub aggressively; think of polishing a gemstone—gentle strokes. Remember, the sensor’s delicate elements are like tiny, precise scales; rough handling damages their ability to detect correctly. During my last cleaning, I used a soft-bristled brush to remove stubborn dust without scratching the surface.
Avoid Liquid Buildup
Ensure no excess liquid remains. Use a dry microfiber cloth to absorb residual moisture. Excess liquid can cause short circuits. After my first attempt, I learned that air-drying in a warm, dust-free environment for at least 10 minutes is ideal before reconnecting.
Reconnect and Test
Carefully plug in the sensor’s electrical connector, ensuring it clicks into place. Start your vehicle and observe for warning lights or irregular behavior. If the sensor was properly cleaned, you should see improvements in performance and fewer error codes. Remember, a clean sensor can contribute significantly to engine efficiency, as noted in engine health resources.
Final Tips to Maintain Sensor Integrity
Repeat this cleaning process during routine maintenance—ideally, every 20,000 to 30,000 miles or when you notice symptoms like rough idling or poor acceleration. Always consult your vehicle’s manual or a certified mechanic if unsure. I’ve found that inconsistent cleaning or using harsh chemicals can accelerate sensor failure, leading to more frequent diagnostics, as discussed in articles about professional maintenance.
When it comes to vehicle maintenance, many believe that sticking to the basics—like regular oil changes and trusting ASE-certified technicians—is enough to keep their cars running smoothly. However, beneath these common practices lie subtleties that can significantly impact your car’s longevity and performance. One widespread myth is that all oils and services are created equal; in reality, understanding the differences between synthetic and conventional oils, and recognizing the limitations of even certified technicians, can save you from costly mistakes. For example, relying solely on dashboard oil life indicators without considering your driving habits or engine condition can lead to under- or over-maintenance. Moreover, many assume that transmission fluid lasts forever, but studies, including insights from industry experts, reveal that conventional claims of ‘lifetime’ transmission fluid are often misleading and can cause transmission failure if ignored. Advanced symptoms like gear slipping or hesitation might be mistaken for minor issues, but they often indicate critical problems that require prompt, specialized attention. Overlooking these nuances risks building up sludge or causing premature wear, particularly if you follow generic service intervals rather than tailored inspections. An essential thing to note is that modern engines are more complex and sensitive to servicing errors than ever—using improper products or neglecting specific steps can accelerate deterioration. For instance, using aggressive degreasers on delicate components can damage seals or sensors, leading to leaks or faulty readings.
What advanced signs should you watch for that indicate your service plan needs adjustment?
Recognizing subtle cues—like irregular engine noise, slight shifts in fuel efficiency, or unusual vibrations—can be invaluable. Consulting detailed guides and professional diagnostics ensures you address issues before they become costly repairs. According to a study published by automotive engineers, early detection of small but persistent anomalies can prevent major component failures, saving you money and downtime. Don’t assume that a quick visit for a standard service is sufficient; sometimes, customized diagnostics and proactive maintenance are the secrets to a reliable, long-lasting vehicle. Have you ever fallen into this trap? Let me know in the comments.
Investing in Quality Equipment for Long-Term Performance
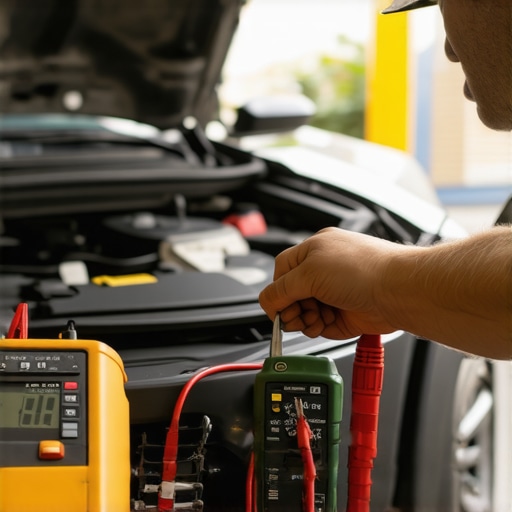
When it comes to maintaining your vehicle, especially critical systems like the transmission or engine, the right tools can make all the difference. I personally rely on a high-precision digital multimeter from Fluke, which I use to verify sensor voltage outputs after cleaning or repair—accurate readings prevent misdiagnosis and ensure that components function optimally. Additionally, a laser-coded infrared thermometer helps me quickly identify overheating parts or clogged radiators, saving time and preventing potential failures.
For more delicate operations, such as inspecting electrical connections or replacing sensitive sensors, I use a non-contact voltage tester. This allows me to safely confirm live circuits without risking damage. These tools are reliable, durable, and essential for ASE-certified work, offering peace of mind for both DIY enthusiasts and professional mechanics alike.
Applying Software for Better Diagnoses
Modern vehicles come equipped with complex electronic systems. To stay ahead, I utilize advanced diagnostic software like AutoEnginuity’s Scan Tool, which connects to the vehicle’s OBD-II port and provides real-time data, freeze-frame data, and comprehensive trouble code analysis. This software integrates with my laptop, allowing me to perform detailed checks without guesswork. The trend in diagnostics is moving rapidly toward more integrated and user-friendly software solutions, making it easier to track long-term performance trends, such as oil wear levels or transmission health.
By regularly downloading and analyzing diagnostic data, I can spot patterns that indicate upcoming issues—like diminishing transmission fluid quality or diminishing sensor accuracy—and address them proactively. Staying updated with the latest software versions also ensures compatibility with newer vehicle models and features, protecting your investment and maximizing reliability.
Developing a Routine Maintenance Workflow
My routine includes a straightforward checklist: after every oil change, I inspect and clean sensors with a dedicated electronics-safe cleaner; check all fluid levels—including transmission [more info here](https://autofixclinic.com/the-hidden-sludge-trap-inside-your-engine-that-standard-oil-changes-always-miss); and verify electrical connections with my multimeter. Having a digital record of diagnostics results helps track component lifespan, especially for high-wear parts like spark plugs or injectors.
Scaling your maintenance approach involves scheduling regular inspections based on vehicle usage rather than solely relying on mileage. For example, vehicles driven in harsh climates or stop-and-go traffic might need more frequent sensor cleaning or fluid checks. Tools like a magnetic drain plug for synthetic oils or a chassis inspection mirror streamline the process, ensuring no detail is overlooked. Consistent, methodical maintenance extends the lifespan of vital components and reduces costly breakdowns.
How do I maintain vehicle performance over time?
It’s essential to combine quality tools with a disciplined routine—regularly testing, cleaning, and updating diagnostics. For example, trying an advanced sensor cleaning method with electronics-safe cleaner and inspecting connections with a multimeter can significantly improve reliability. Remember, proactive maintenance rooted in accurate diagnostics and proper equipment prevents small issues from becoming expensive repairs. For further insights, consider exploring [this resource on engine oil contamination](https://autofixclinic.com/the-hidden-sludge-trap-inside-your-engine-that-standard-oil-changes-always-miss), which emphasizes the importance of proper inspection tools and methods for engine longevity.
The Hardest Lesson I Learned About Car Service, ASE Certified, Transmission, Oil Change
One of the most eye-opening experiences in my auto maintenance journey was realizing that even trusted chemicals like brake cleaner can cause lasting damage when misused on sensitive sensors. This mistake taught me to value precise, manufacturer-approved cleaning methods over quick fixes that seem convenient but are risky in disguise.
3 Misconceptions About Car Maintenance That Nearly Cost Me Big
I used to believe that all oils, whether synthetic or conventional, could be mixed without issue. It wasn’t until I read detailed guides on engine wear that I understood how wrong I was. Now, I know that understanding the specific needs of your vehicle—especially regarding oils—is essential for longevity.
What Experts Won’t Tell You About ASE Certification and Vehicle Care
Most folks assume that an ASE-certified mechanic is infallible. While certification is a mark of professionalism, it’s equally important to understand what questions to ask and how to identify the true experts. Continuing education and staying updated on the latest vehicle technologies can make all the difference.
My Essential Toolkit for Smarter Car Care
Investing in quality diagnostic tools like a Fluke multimeter and an infrared thermometer has transformed my maintenance routine. These tools help me verify sensor voltages and identify overheating issues early, saving money and reducing guesswork. They’re tools I rely on for confident decision-making.
Your Next Step in Vehicle Confidence
Now that you’ve seen how a single mistake can cascade into costly repairs, it’s your turn to embrace proactive, knowledgeable maintenance. Regularly inspecting and cleaning critical components with the right techniques and tools keeps your car performing at its best. Remember, the effort you put in today pays dividends in reliability tomorrow.
Have you ever had a moment where a small maintenance error turned into a bigger problem? Share your story below—I’d love to hear it.