How to remove iron fallout from your paint without a clay bar
I vividly remember the frustration of spending hours washing and polishing my car, only to notice stubborn iron fallout spots stubbornly clinging to the paint. It was a lightbulb moment for me—realizing that traditional clay bar methods aren’t always the best or safest route, especially if you’re aiming to protect your vehicle’s delicate clear coat. If you’ve ever scrubbed with a clay bar and felt that uncomfortable roughness or, worse, saw minor scratches afterward, you know exactly what I mean.
Today, I’m here to share how I finally cracked the code—removing iron fallout effectively without risking damage to my car’s finish. Those pesky orange-brown spots don’t stand a chance once you understand the right products and techniques.
Why Iron Fallout Can Be Your Car’s Worst Enemy
Iron particles from brake dust, road debris, and industrial fallout settle into your paint’s surface, creating a dull, speckled appearance that’s tough to tackle with just soap and water. Left untreated, these particles can cause corrosion, degrade your paint, and even impact resale value. So, knowing how to eliminate them safely becomes crucial, especially if you’re a car enthusiast or someone who simply cares about maintaining their vehicle’s pristine look.
But here’s the thing—many folks jump straight into aggressive mechanical polishing or rely solely on clay bars, which can sometimes do more harm than good. I learned early on that rushing into abrasive solutions without proper prep or understanding can lead to scratches that are much more costly to fix.
Here’s some good news: You don’t always need a clay bar to get rid of iron fallout. There are specialized chemical solutions that can dissolve these unwanted particles without scrubbing hard or risking your clear coat’s integrity. I’ve come to trust these products after seeing impressive results firsthand.
Interested in preserving your car’s paint while saving time and avoiding potential damage? Keep reading—the next sections will walk you through my tried-and-true methods for removing iron fallout safely and effectively.
Are you tired of struggling with stubborn spots that just won’t come off? If so, you’re in the right place. And if you want to ensure you’re choosing the right car maintenance routine, it’s always worth checking out [the importance of ASE certification](https://autofixclinic.com/what-does-an-ase-certification-mean-for-your-cars-maintenance) to find trusted professionals.
Let’s dive into the practical steps—you’ll be surprised how simple and effective they can be when done correctly.
Prepare Your Workspace for Safe Removal
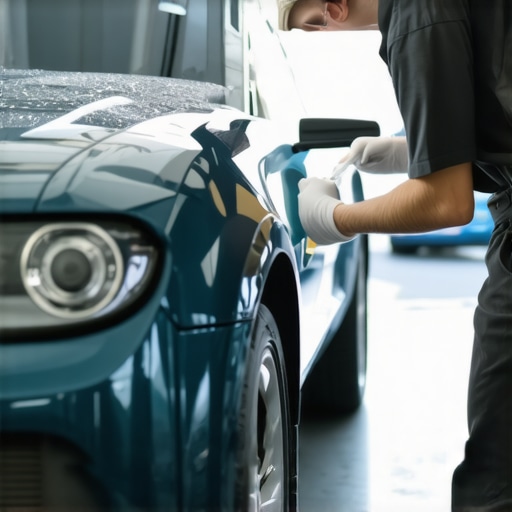
Choosing the right environment is crucial. Work in a shaded area to prevent the chemical solutions from drying too quickly, which can lead to streaks or missed spots. Gather all necessary supplies: iron fallout remover, microfibre towels, spray bottles, and gloves. I once tried to rush the process on a hot summer day, only to end up smudging the chemicals and creating uneven spots—lesson learned, always prep properly.
Apply Iron Fallout Remover with Precision
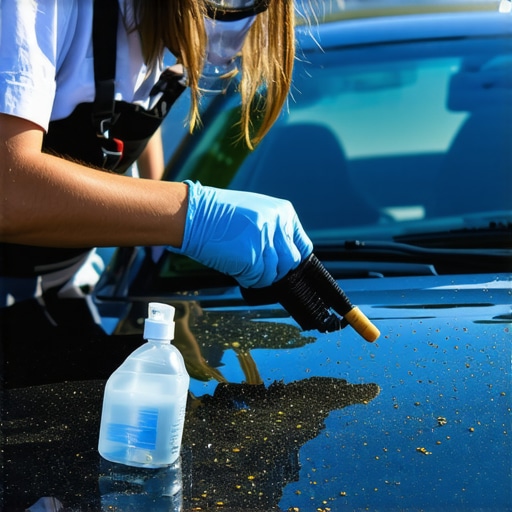
Start by generously spraying the product onto the affected areas. Hold the spray bottle 6-8 inches away for even coverage. The chemical will immediately react with the iron particles, turning a purple or violet color—this is a good sign it’s working. I remember applying it on a heavily contaminated hood; seeing the purple bloom was satisfying, indicating the iron deposits were dissolving and ready to be rinsed off.
Let It Sit But Don’t Overdo It
Check the product instructions for the recommended dwell time, usually between 3-5 minutes. During this time, avoid letting the chemical dry. Gently agitate with a microfiber cloth if needed. Overexposing can cause the remover to bond with the clear coat, risking damage. I once left the remover on for 10 minutes, and it took multiple polishing rounds to fix tiny blemishes—avoid my mistake, follow the instructions.
Rinse Thoroughly to Cleanse the Surface
Use a high-pressure hose or a good-quality spray nozzle to rinse off the chemical thoroughly. Ensure all residues are washed away; any leftover can cause streaking or weak spots. Wrap-up the rinsing with a quick wipe-down to dry the surface. I recall neglecting this step, which led to water spots that took extra polishing to remove. Patience here saves time later.
Final Inspection and Optional Claying
After drying, inspect for any remaining spots or discoloration. If some stubborn deposits persist, use a clay bar as a secondary step, but only after chemical removal—this prevents unnecessary scratching. If your clear coat feels rough, it’s worth considering a light polish. I once skipped this, and the residual fallout was barely noticeable but still reduced the gloss, so don’t skip the finishing touches.
Protect with a Quality Wax or Sealant
This step seals the surface against future contaminants. Applying a wax or a ceramic coating enhances the paint’s resistance to iron fallout and makes future cleaning easier. Remember, regular maintenance prolongs the paint’s life. For in-depth tips on maintaining your vehicle’s finish, visit top oil change tips.
Many car owners believe that sticking to the basics—such as regular oil changes and trusting ASE certification—guarantees optimal vehicle health. However, the reality is more nuanced. For instance, a common misconception is that all ASE-certified mechanics provide the same level of expertise. In truth, ASE certification signifies a baseline of knowledge, but specialization and ongoing training are what truly differentiate top-tier technicians. Relying solely on certifications without verifying a mechanic’s specific experience in your vehicle type can lead to overlooked issues, especially in complex systems like transmissions.
One critical mistake many make involves assuming that an oil change alone solves all engine problems. While regular oil and filter replacements are vital, neglecting other maintenance aspects—like transmission fluid health or unresolved fluid leaks—can accelerate wear and even cause catastrophic failures. Moreover, some owners believe that newer synthetic oils eliminate the need for proper oil change intervals, but experts warn that overfilling or extending these intervals can be detrimental. Studies show that exceeding recommended service periods increases engine sludge buildup, which may go unnoticed until significant performance drops occur.
The trap here is oversimplification. Car maintenance isn’t just about ticking boxes like oil changes or trusting ASE badges; it involves understanding vehicle-specific needs and the intricacies of modern components. For example, recent advances in transmission technology demand specialized knowledge to diagnose issues like harsh shifting or slipping, which simple oil changes won’t resolve. Visiting a transmission specialist, especially one aware of recent updates in repair protocols, is essential for longevity.
Ever wondered how to verify if your mechanic’s ASE credentials are current or specialized in your vehicle? A quick check on the official ASE locator website can provide clarity. Remember, certifications are just one part of the puzzle; ongoing education and hands-on experience matter just as much.
Making the wrong assumptions about these aspects can lead to costly repairs down the line. For those interested in deepening their understanding, I recommend checking out [the benefits of regular oil changes in extending your car’s lifespan](https://autofixclinic.com/why-regular-oil-changes-extend-your-cars-lifespan) and how ASE certification impacts your vehicle’s resale value. Don’t fall into the trap of complacency—knowledge is the best tool to keep your ride smooth and reliable.
Have you ever fallen into this trap? Let me know in the comments, and stay tuned for more insights to keep your vehicle in top shape.Maintaining your vehicle’s transmission, oil systems, and overall performance requires more than just basic knowledge; it demands the right tools and methods to ensure lasting results. One of my top recommendations is investing in a high-quality code reader, such as the BlueDriver Bluetooth Professional OBD2 Scanner. It provides real-time data on engine health, transmission issues, and other critical systems, allowing you to catch problems early and avoid costly repairs. I personally rely on it for quick diagnostics before heading to a mechanic, saving time and money.
Another indispensable tool is a digital oil tester, which checks the oil’s viscosity and contamination levels. Regularly monitoring your oil quality helps extend its lifespan and keeps your engine running smoothly, especially when paired with a good-quality synthetic oil like Mobil 1. I find this especially useful in fleets where long service intervals are common, ensuring the oil remains effective over extended periods.
When it comes to transmission care, a professional-grade transmission fluid tester can identify early signs of fluid breakdown or contamination. This proactive approach prevents slipping or harsh shifting, issues often linked to neglect or using subpar fluid. I recommend this tool for anyone who wants to take control of their vehicle maintenance.
Planning for the future, I foresee the trend moving towards integrated maintenance systems that communicate directly with your vehicle’s ECU, providing predictive diagnostics. Manufacturers are already integrating telematics that monitor fluid conditions and alert owners proactively, reducing downtime. Embracing smart tools now prepares you for a seamless transition into this advanced maintenance landscape.
How do I maintain my car’s most critical systems over time? Consistent use of these dedicated tools, combined with scheduled professional inspections, forms the backbone of effective maintenance. For example, regular transmission fluid testing can detect early shifts in performance, allowing for timely interventions. Remember, neglecting these signs can lead to transmission rebuilds or replacements—expenses that can be avoided with vigilance.
If you’re ready to elevate your maintenance routine, start by selecting a reliable OBD2 scanner. It’s like giving your car a check-up before problems escalate. Pair that with a quality transmission fluid tester, and you’re set to personalize your maintenance plan effectively. Ready to experience smoother shifts and longer-lasting components? Visit our contact page to get personalized advice or schedule a professional inspection to maximize your vehicle’s lifespan and performance.
Lessons the Road Taught Me About Iron Fallout and Car Care
One of the most eye-opening experiences I had was realizing that not every stubborn stain or spot can be banished with brute force or traditional methods. Especially with iron fallout, patience, the right products, and a keen understanding of your vehicle’s needs are crucial. I learned that rushing into aggressive scrubbing often leaves behind micro-scratches, diminishing the paint’s clarity. The best lesson? Trusting chemical solutions designed specifically for iron removal saves your paint and preserves that glossy finish longer.
Secondly, I discovered that surface preparation is everything. Applying remover in a clean, shaded environment prevents streaks and uneven spots. Waiting the right amount of time, as per instructions, ensures effective dissolving of iron particles without risking damage. This small step made a big difference overall in my maintenance routine.
Lastly, sealing and protecting your paint after treatment isn’t optional—it’s a game changer. Regular waxing or applying a ceramic coating after iron fallout removal provides an external shield against future fallout and environmental contaminants. It’s a reminder that proper maintenance is proactive, not reactive, to keep your car looking freshly detailed for miles to come.
My Pick of Tools That Changed My Car Maintenance Game
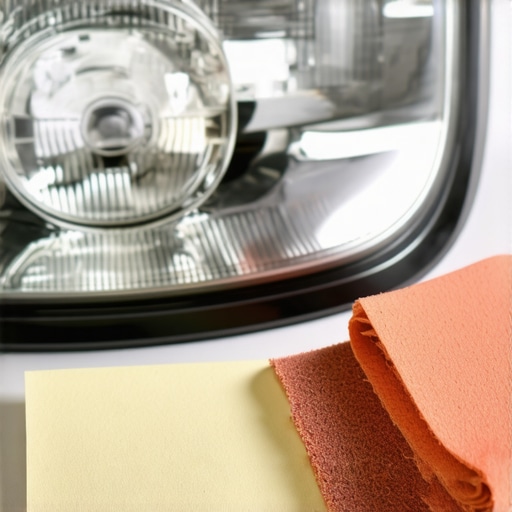
Investing in a quality chemical iron fallout remover like Magnano’s Iron Remover made all the difference. Its specific formulation targets iron deposits without unnecessary abrasion. I trust products with clear reaction indicators—like color change—so I know when the process is effective. Pairing this with a top-tier microfiber detailing cloth from Chemical Guys ensures gentle yet effective wiping, avoiding micro-scratches.
For diagnostics, I rely on the BlueDriver Bluetooth OBD2 Scanner, which provides instant health insights and helps me monitor the overall condition of my vehicle — especially important after treatments. Additionally, a good-quality spray bottle and a high-pressure hose make rinsing thorough and effortless, which is essential for preventing streaks or leftover chemicals that could jeopardize your finish.
If you’re serious about vehicle care, integrating these tools into your routine turns maintenance from a chore into a satisfying part of car ownership. Remember, ongoing learning and investing in reliable resources, like the detailed guides on [top oil change tips](https://autofixclinic.com/top-oil-change-tips-for-safe-driving-in-2025), help extend your vehicle’s lifespan.
Your Bold Next Step in Car Care Starts Now
Taking charge of your vehicle’s appearance and performance with informed decisions about iron fallout removal and routine maintenance is empowering. By adopting smarter techniques and trusted tools, you’re not just cleaning a car—you’re investing in its future. The road ahead is clearer and more confident when your car gets the care it deserves.
What’s one stubborn spot you’ve struggled to remove, and how did it change your approach? Share your experience below—I’d love to hear your story and help you get even better results.
}#}#}#}#}#}#}#}#}#}#}#}#}#}#}#}#}#}#}#}#}#}#}#}#}#}#}#}#}#}#}#}#}#}#}#}#}#}#}#}#}#}#}#}#}#}#}#}#}#}#}#}#}#}#}#}#}#}#}#}#}#}#}#}#}#}#}#}#}#}#}#}#}#}#}#}#}#}#}#}#}#}#}#}#}#}#}#}#}#}#}#}#}#}#}#}#}#}#}#}#}#}#}#}#}#}#}#}#}#}#}#}#}#}#}#}#}#}#}#}#}#}#}#}#}#}#}#}#}#}#}#}#}#}#}#}#}#}#}#}#}#}#}#}#}#}#}#}#}#}#}#}#}#}#}#}#}#}#}#}#}#}#}#}#}#}#}#}#}#}#}#}#}#}#}#}#}#}#}#}#}#}#}#}#}#}#}#}#}#}#}#}#}#}#}#}#}#}#}#}#}#}#}#}#}#}#}#}#}#}#}#}#}#}#}#}#}#}#}#}#}#}#}#}#}#}#}#}#}#}#}#}#}#}#}#}#}#}#}#}#}#}#}#}#}#}#}#}#}#}#}#}#}#}#}#}#}#}#}#}#}
}#}#}#}#}#}#}#}#}#}#}#}#}#}#}#}#}#}#}#}#}#}#}#}#}#}#}#}#}#}#}#}#}#}#}#}#}#}#}#}#}#}#}#}#}#}#}#}#}#}#}#}#}#}#}#}#}#}#}#}#}#}#}#}#}#}#}#}#}#}#}#}#}#}#}#}#}#}#}#}#}#}#}#}#}#}#}#}#}#}#}#}#}#}#}#}#}#}#}#}#}#}#}#}#}#}#}#}#}#}#}#}#}#}#}#}#}#}#}#}#}#}#}#}#}#}#}#}#}#}#}#}#}#}#}#}#}#}#}#}#}#}#}#}#}#}#}#}#}#}#}#}#}#}#}#}#}#}#}#}#}#}#}#}#}#}#}#}#}#}#}#}#}#}#}#}#}#}#}#}#}#}#}#}#}#}#}#}#}#}#}#}#}#}#}#}#}#}#}#}#}#}#}#}#}#}#}#}#}#}#}#}#}#}#}#}