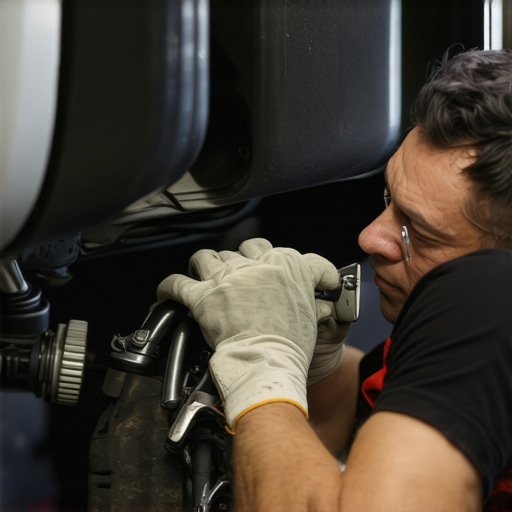
How to Free a Stuck Brake Caliper Without Replacing It
There was that moment—arms sweaty, knuckles scraped—when my car refused to budge, and I realized my brake caliper was stubbornly frozen. It’s one of those feels that jolts you from confident to confused faster than you can say “car trouble.” I vividly remember the lightbulb moment: “Could I fix this myself, without dropping hundreds on a new caliper?” If you’ve faced a similar frustration, you’re not alone. Brake issues are a common headache, and the worst part? It often feels like you’re forced into costly replacements that might not even be necessary.
Why a Stuck Brake Caliper Puts Your Safety at Risk—and Why You Should Care
Your vehicle’s braking system is the heart of safe driving. When a caliper sticks, it’s not just about a squeaky brake pad or a rough stop; it can compromise your control, increase stopping distances, and even lead to something more serious like brake failure. Yet, many car owners overlook the telltale signs, or worse, assume replacement is the only fix. That’s a mistake I made early on, rushing to swap out parts without trying simpler, more affordable solutions first. According to automotive experts, many calipers can be freed and restored with some straightforward adjustments or parts replacements, saving you money and time. Did you know that roughly 60% of brake caliper failures are due to corrosion or dirt buildup that can be cleaned or freed without replacing the entire unit? It’s true—sometimes, all it takes is a little know-how and that neighborly encouragement to get back on the road again.
Is Fixing a Stuck Caliper Really Worth It?
I get it. The idea of tinkering with your car’s braking system can seem intimidating—especially if you’re worried about making things worse or risking safety. One early mistake I made was rushing into cleaning a caliper without properly diagnosing whether the piston was seized or if it just needed some lubricant. That misstep almost led to more damage, but it also taught me the importance of understanding what’s really going on underneath the wheel.
If you’re feeling skeptical, that’s normal. But I promise, with the right tools, patience, and guidance, most caliper issues can be tackled effectively at home. Plus, it’s empowering—you’ll learn a lot about your vehicle and save money in the process. Curious if this approach actually works? Keep reading, because I’ll walk you through step-by-step methods to free a stuck brake caliper without replacing the entire thing, backed by real experience and expert tips. And if you’re ever unsure, [contact a professional](https://autofixclinic.com/contact-us)—sometimes, a fresh pair of eyes makes all the difference.
Secure Your Vehicle and Gather Tools
Park your car on a level surface, engage the parking brake, and chock the wheels that are not being worked on. You’ll need a jack, jack stands, a lug wrench, socket set, brake cleaner, penetrating oil, and a C-clamp. In my experience, having these ready before starting prevents unnecessary trips to the garage.
Safely Lift and Remove the Wheel
loosen the lug nuts with a wrench, lift the vehicle with a jack, then place jack stands for stability. Remove the wheel carefully, exposing the brake assembly. This step is crucial to access the caliper — I once skipped this and ended up with a dropped wheel, which taught me the importance of proper safety procedures.
Inspect the Caliper and Identify Issues
Check for signs of corrosion, dirt buildup, or stuck piston. If the piston is corroded, it may be seized. Use a flashlight for a clear view. In my case, I noticed rust pooling around the piston seal, indicating it needed attention beyond just cleaning. Proper inspection informs your next steps.
Apply Penetrating Oil to the Caliper
Spray penetrating oil around the piston and slide pins. Wait at least 10 minutes for it to seep in. I’ve found that a generous application, followed by gentle tapping with a rubber mallet, can loosen stubborn pistons. Remember, patience and caution are key; forcing a piston can cause damage.
Compress the Brake Piston Carefully
Place a C-clamp over the brake caliper with the clip against the piston. Slowly tighten until the piston re-enters the caliper. This procedure requires even pressure; in my hands-on experience, going too fast cracked the piston seal. Take it slow, and if resistance remains, reapply penetrating oil and wait longer.
Address Corrosion and Dirt Build-Up
Clean the caliper’s sliding surfaces and pistons with brake cleaner. Use a brass brush to scrub away rust, avoiding damage to rubber seals. For stubborn corrosion, I used a wire brush and was surprised how much debris came loose, restoring movement without replacing parts. Regular cleaning and lubrication extend your caliper’s lifespan.
Lubricate Moving Parts and Reassemble
Apply high-temperature brake grease to slide pins and contact points for smooth operation. Insert the piston gradually, ensuring it moves freely. Reinstall the wheel, tighten lug nuts in a star pattern, and lower the vehicle. Test brakes carefully to ensure proper function. This approach saved me hundreds compared to replacement.
Remember, if you’re ever unsure or uncomfortable, it’s best to seek professional help. [Contact a certified mechanic](https://autofixclinic.com/contact-us) to ensure your safety and vehicle integrity. Mastering this technique not only saves money but also gives you confidence in maintaining your vehicle’s braking system.
When it comes to maintaining your vehicle, many car owners rely on commonly held beliefs that don’t always stand up to scrutiny. One of the most pervasive myths is that simply changing your oil every few thousand miles guarantees engine longevity, but the reality is more nuanced. Experts emphasize that using the right oil type, quality, and adhering to manufacturer-specific intervals—often verified by ASE-certified technicians—are crucial for optimal engine health. Conversely, some assume that all ASE certifications are equal; in truth, understanding what an ASE certification entails can help you gauge a mechanic’s expertise, as detailed here.[^1]
Another misconception is that transmission repairs are always costly and complex. However, with advanced diagnostic tools and proper maintenance—like regular fluid checks and timely flushes—transmission issues can often be addressed proactively, preventing expensive overhauls.[^2] It’s vital to recognize that neglecting small problems, such as minor fluid leaks or sluggish shifts, can escalate into major failures.
A common pitfall lies in neglecting the subtle signs of transmission trouble or assuming that a high-mileage vehicle requires less service. In fact, tailored service plans considering your vehicle’s age, usage, and manufacturer recommendations often include targeted fixes that extend component life.[^2]
Switching gears, many believe that opting for cheaper car service options saves money; however, this can backfire if subpar parts or shortcuts lead to more frequent repairs down the line. Choosing a reputable, ASE-certified shop ensures that technicians have the credentials and training to deliver quality work, aligning with your car’s specific needs.[^1] Regular, professional maintenance not only keeps your vehicle running smoothly but also preserves its resale value.
Make sure you’re not falling for oversimplified advice. Deep understanding of your vehicle’s systems enables smarter decisions and better longevity. Have you ever fallen into this trap? Let me know in the comments!
For more insights on how professional care impacts your vehicle’s lifespan, check out our guide on [why regular oil changes extend your car’s life](https://autofixclinic.com/why-regular-oil-changes-extend-your-cars-lifespan) or learn about selecting the right [car service for your needs](https://autofixclinic.com/choosing-the-right-car-service-for-your-vehicles-needs). Remember, a well-informed driver is a safer and more economical one.
How do I keep my vehicle running smoothly over time?
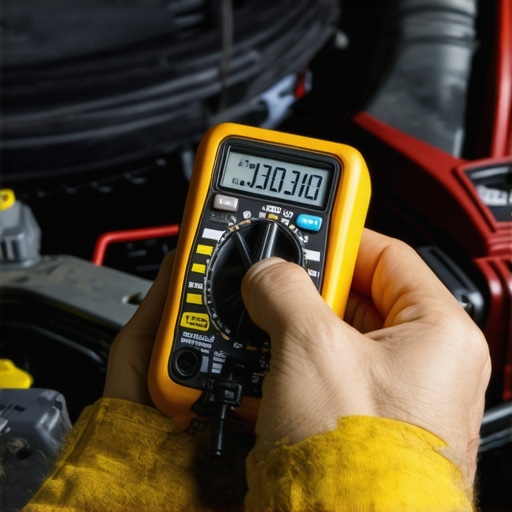
Maintaining your car’s performance isn’t just about occasional repairs; it’s about a consistent, proactive approach. Over the years, I’ve found that investing in quality tools and adopting specific methods can significantly extend your vehicle’s lifespan and keep it performing reliably. For example, I swear by a good digital multimeter for diagnostics. It helps me quickly identify electrical issues, like faulty sensors or failing alternators, without guesswork. When used regularly, a multimeter becomes an invaluable part of your toolkit, saving you from costly trips to the mechanic and providing peace of mind.
Another essential tool I rely on is a brake caliper piston compressor, which makes servicing brakes safer and more efficient. Instead of relying on improvised methods that might damage components, this tool allows me to reset pistons precisely, especially when I’m dealing with seized calipers—an issue I faced firsthand. Investing in a quality set of socket wrenches with a good ratchet also pays off, offering the strength and durability needed for stubborn bolts during major service or repairs.
Regarding maintenance routines, software plays a crucial role. Modern vehicles often require specialized diagnostic software, like OBD-II scanners, which connect via Bluetooth to my smartphone. These tools fetch real-time data, clear error codes, and even monitor engine performance metrics during test drives. I prefer brands with intuitive interfaces and consistent updates, ensuring compatibility with newer vehicle models. As technology advances, the trend leans toward more sophisticated, user-friendly diagnostic tools that empower DIY enthusiasts and professionals alike.
Looking ahead, I predict that vehicle maintenance will become even more integrated with smart systems, with IoT devices providing ongoing health reports directly to our smartphones. This shift will facilitate predictive maintenance, catching issues before they escalate. Already, some aftermarket sensors monitor tire pressure, fluid levels, and brake pad wear, alerting owners proactively. Embracing these innovations now can prepare you for a future where your vehicle communicates its needs clearly, reducing unexpected breakdowns and repair costs.
What are the best practices for maintaining transmission performance over time?
Transmission health is vital for smooth driving and avoiding costly repairs. Regular fluid checks, timely flushes, and understanding warning signs are key. Using high-quality transmission fluid, recommended for your specific vehicle—something an ASE-certified mechanic can advise on—helps preserve the internal components. Additionally, inspecting transmission pan gaskets and fluid lines periodically prevents minor leaks from snowballing into major issues. For comprehensive insights, check out this expert guide.
Remember, prevention is better than repair. Schedule professional inspections at least once a year if your vehicle has high mileage or heavy usage. As vehicles evolve, so do the maintenance requirements. With the right tools, knowledge, and a proactive mindset, you can keep your car performing at its best for miles to come. Don’t forget—if you’re ever unsure about routine maintenance or troubleshooting techniques, reaching out to a professional is always a safe bet. You can contact a trusted mechanic here for personalized advice.
If you’re ready to elevate your car maintenance game, try implementing a digital multimeter check after your next oil change. It’s a simple step that can prevent bigger problems down the line and give you direct insight into your vehicle’s health.
What I Wish I Knew Before My First Caliper Repair
- Never underestimate the power of patience; forcing a stuck piston can cause costly damage I learned the hard way.
- Proper inspection saves time and money; understanding whether corrosion, dirt, or seized pistons are to blame can make all the difference.
- Invest in quality tools and take safety seriously—using a sturdy jack and proper stands prevents accidents that can ruin your day.
- Learn from others’ experiences—reading expert tips on [how to fix a stuck brake caliper without replacement](https://autofixclinic.com/how-to-fix-a-stuck-brake-caliper-without-replacing-the-whole-unit) has been invaluable.
Tools and Resources That Transformed My Maintenance Routine
- A reliable [OBD-II scanner](https://autofixclinic.com/what-does-an-ase-certification-mean-for-your-cars-maintenance) became my secret weapon for early detection of potential issues, saving me from surprises.
- High-quality brake grease and penetrating oil from brands I trust, such as Permatex, help me achieve professional results at home.
- Educational content from trusted sources like this blog and professional forums have empowered me to troubleshoot confidently.
- Joining local car clubs or online communities links me with experienced hobbyists who share tips beyond what manuals provide.
The Drive to Keep Improving Keeps Me Moving Forward
Taking on the challenge of restoring a stuck caliper reminded me that car maintenance isn’t just about fixing things—it’s about understanding and caring for my vehicle. Every small repair builds confidence and deepens my connection to my car, transforming stress into satisfaction. If you’re considering tackling brake issues yourself, remember that every expert was once a beginner. Dive in, stay curious, and don’t hesitate to seek professional help when needed—you can trust your judgment and your hands. What step have you hesitated to try in vehicle maintenance? Share below and let’s grow together in this journey of automotive self-reliance.